


Important Note: The whole point of changing the Account Lockout Threshold in Windows is to strengthen your security by controlling how many failed sign-in attempts are allowed before a user account is temporarily locked. Be sure to keep that in mind when changing the threshold!
Objectives of Changing the Account Lockout Threshold:
- Prevent Brute-Force Attacks: This essentially limits attempts to guess passwords over and over again in order to get unauthorized access.
- Enhance Security: It can reduce the risk of unauthorized access to sensitive accounts and information.
- Balance Security and Usability: Setting an appropriate threshold will keep legitimate users from running into frequent lockouts, too!
- Enable Monitoring: This also tracks failed login attempts, which can help you detect potential security breaches.
- Mitigate Insider Threats: Finally, it limits repeated malicious login attempts within an organization.
To start, you’ll want to access the server or device where you’re planning on changing the account lockout threshold.
1
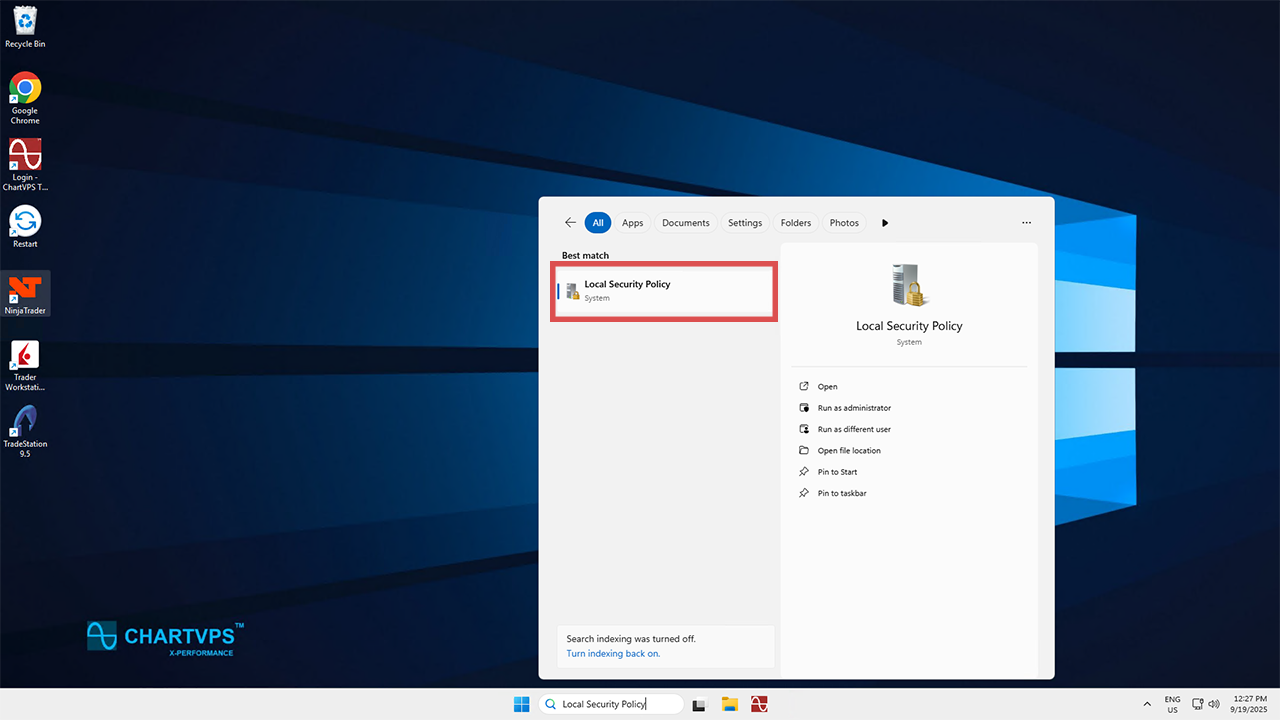
Pop open the Windows Search function (easily done by hitting Win + S) and type either “secpol.msc” or “Local Security Policy.” Click the aptly named option that appears.
2
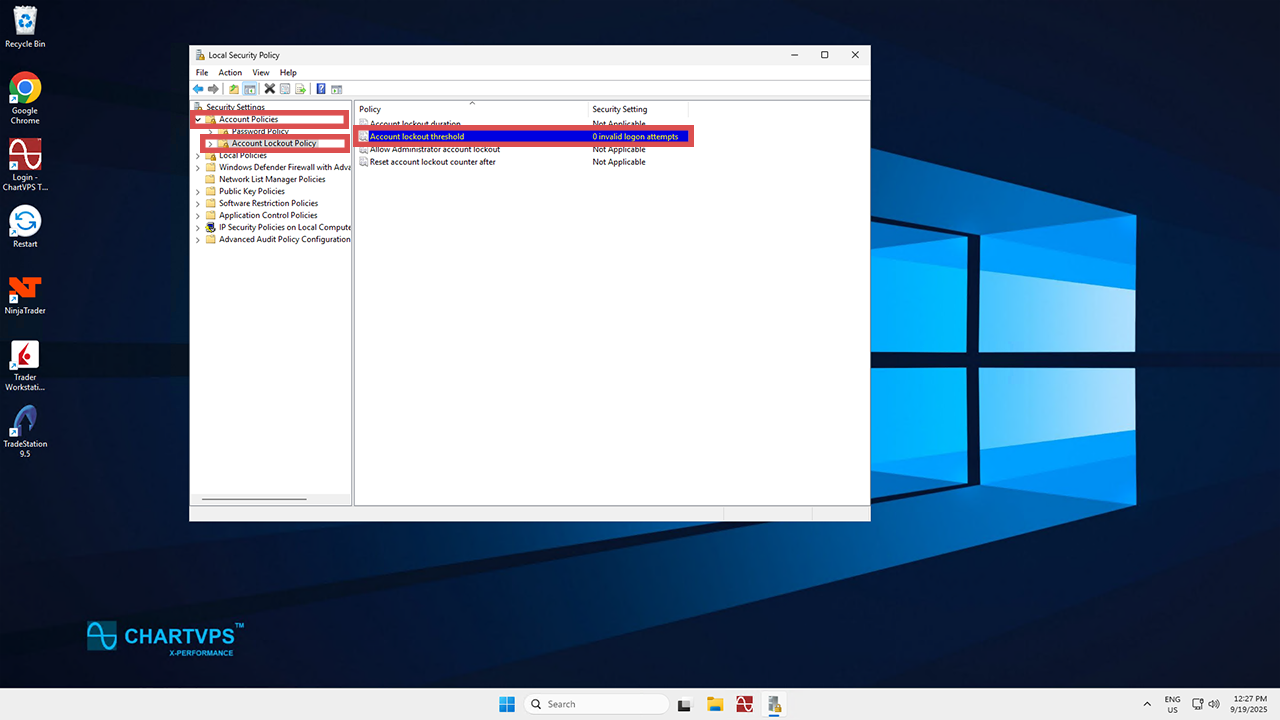
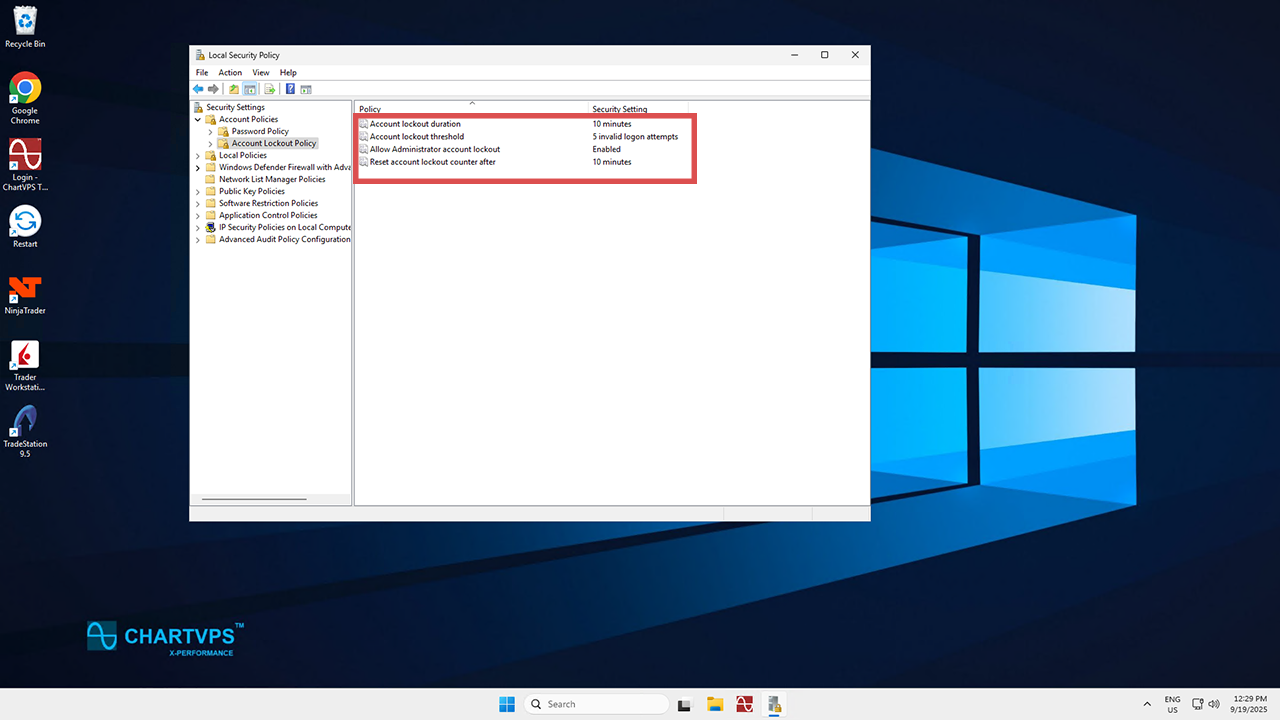
Now that you’re in the Local Security Policy window, go ahead and expand the Account Policies option, which is in the left-hand panel. Then, click on Account Lockout Policy to display all of the related settings, this time on the right-hand side.
3
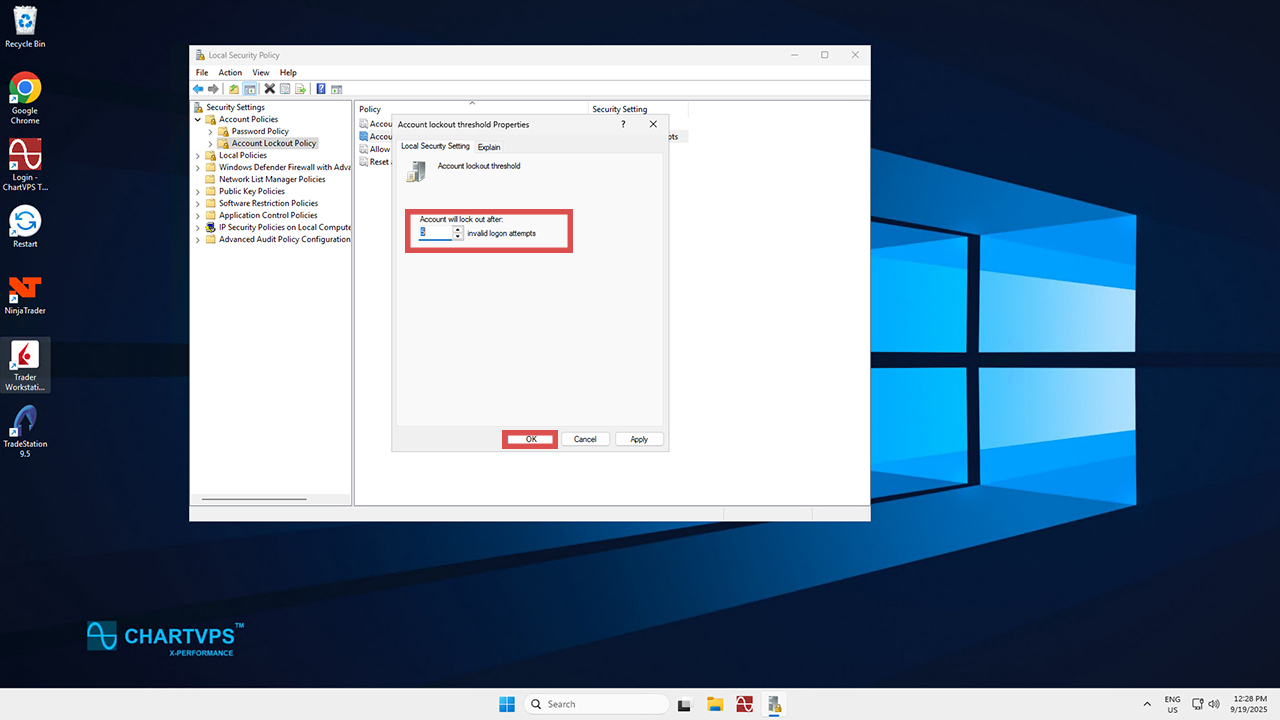
Next, double-click on Account Lockout Threshold from the list of policies. When you do that, a dialogue box will appear. This is where you’ll enter the desired number of invalid login attempts (for example, five before the account gets locked out). Once you’re thrown that number in, hit OK.
4
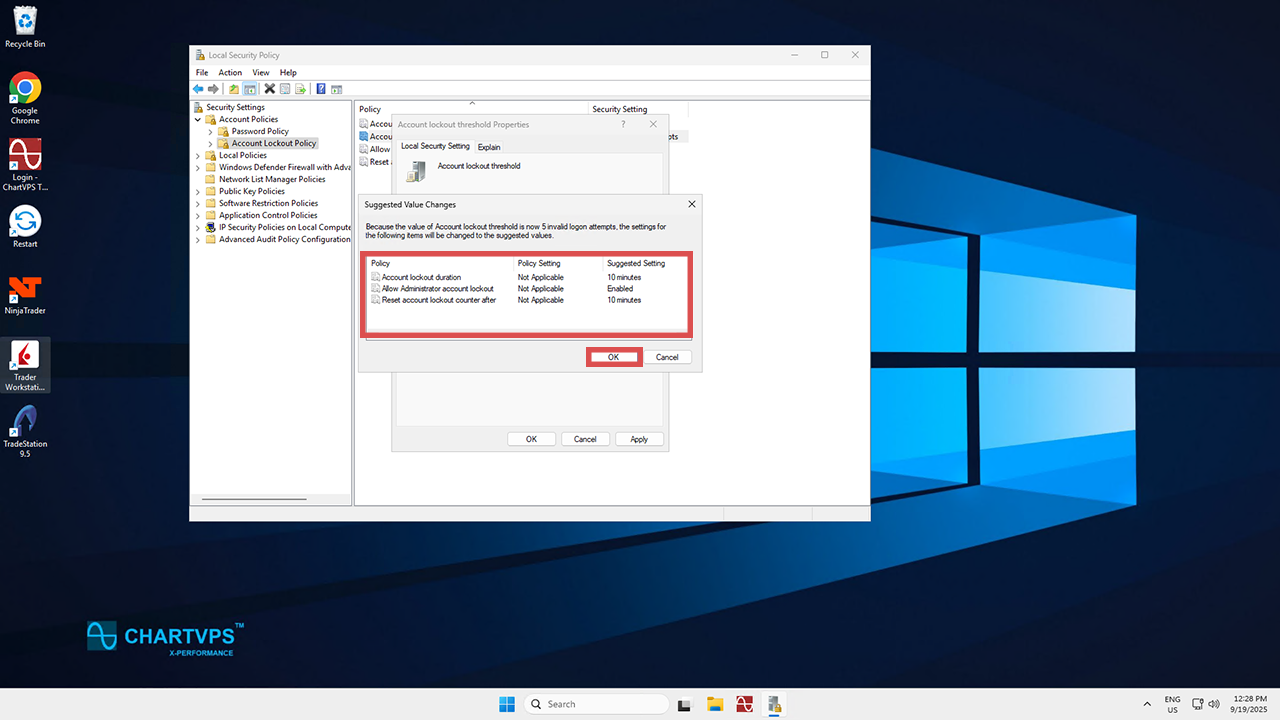
Once you’ve set the threshold, Windows is going to prompt you to configure two more settings automatically:
-
Account Lockout Duration: This sets how long the account remains locked when a lockout happens.
-
Allow Administrator Account Lockdown: This applies the same lockdown rules to an Administrator account as any other account.
-
Reset Account Lockout Counter After: This one determines how long before the failed login attempts counter resets.
Set these parameters to whatever you please or leave them as the default. Then, click OK.
5
Head back to the Account Lockout Policy section in the Local Security Policy window. From there, confirm that your changes to the Account lockout threshold are applied.
6
Once all of your changes are confirmed, you can close the Local Security Policy window. With that, you’re done! Your account lockout threshold is officially configured, making your server safer than ever!
If you’re still having any issues when it comes to connecting to the server, go on and reach out to our support team . They’re around 24/7 and ready to help you out with whatever issues you might have, so they can investigate what happened or even reset the server password if needed.
