A “disk space full” error on your VPS can be a major problem, bringing websites and applications to a halt. When your VPS runs out of disk space, it’s essential to quickly figure out what’s eating all that space so you can free it up. This article is here to guide you through common causes and provide step-by-step solutions to get your server back online!
Understanding Why Your VPS Disk Space Ran Out
Before you can fix the problem, you should understand why it happened. Common reasons include:
-
Log Files: Excessive logging by applications, web servers, or system services can quickly devour disk space.
-
Old Backups: Storing too many local backups or snapshots that are no longer needed.
-
Temporary Files: Applications often create temporary files that aren’t properly deleted.
-
IIS Logs & Caches: If you’re running a web server, the Internet Information Services (IIS) logs and caches can become massive.
-
User Uploads: If your VPS hosts a website or application that allows user uploads, these files can pretty rapidly build up.
-
System Restore Points: While helpful for recovery, these can take up significant disk space.
-
Large Downloads: You may have downloaded large files to the server and forgotten to remove them.
Step-by-Step Solutions to Free Up Disk Space
Solution 1: Use Windows Disk Cleanup
The built-in Disk Cleanup utility is your first and safest option. It can find and remove plenty of common types of junk files.
1
To start with, you’ve got to access Your VPS. Connect using
Remote Desktop Connection on Windows and the
Windows App on other machines. If you can’t connect, you may need to use
the ChartVPS Portal to access the server’s desktop.
2
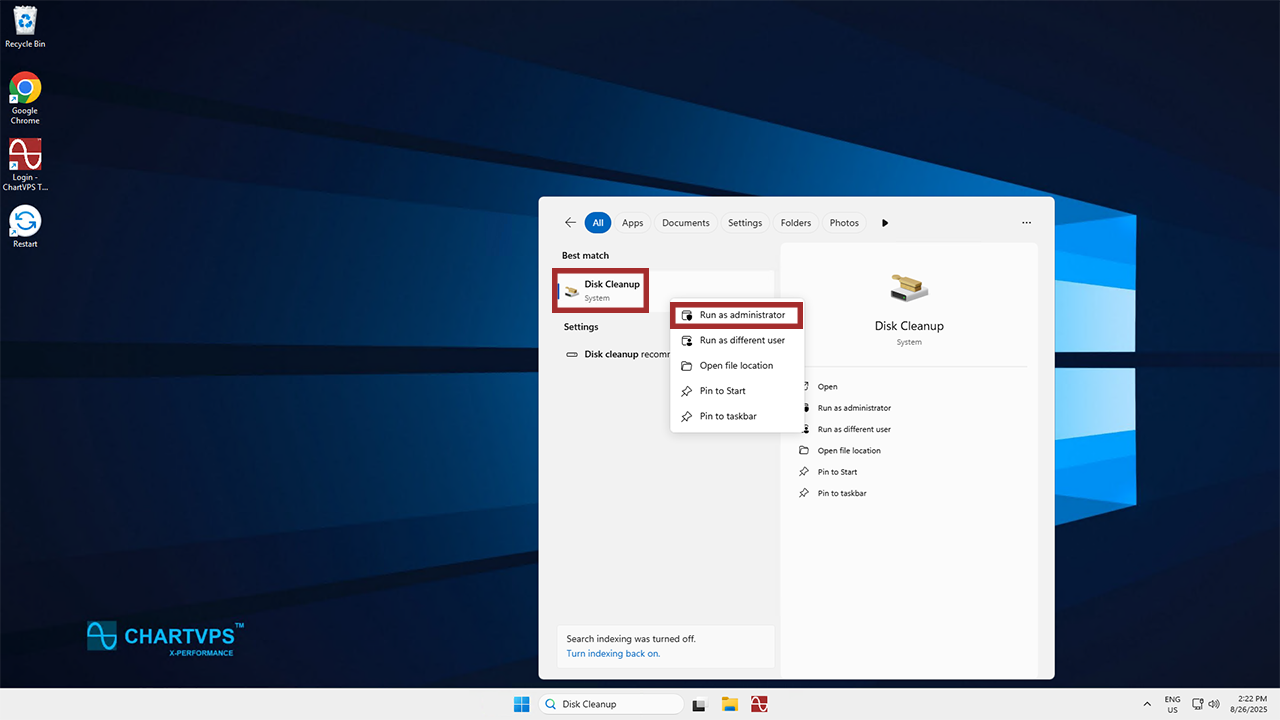
Time to open Disk Cleanup! Navigate over to the Windows search bar at the bottom of the screen and type in “Disk Cleanup.” Then, right-click said program from the menu and hit Run as administrator.
3
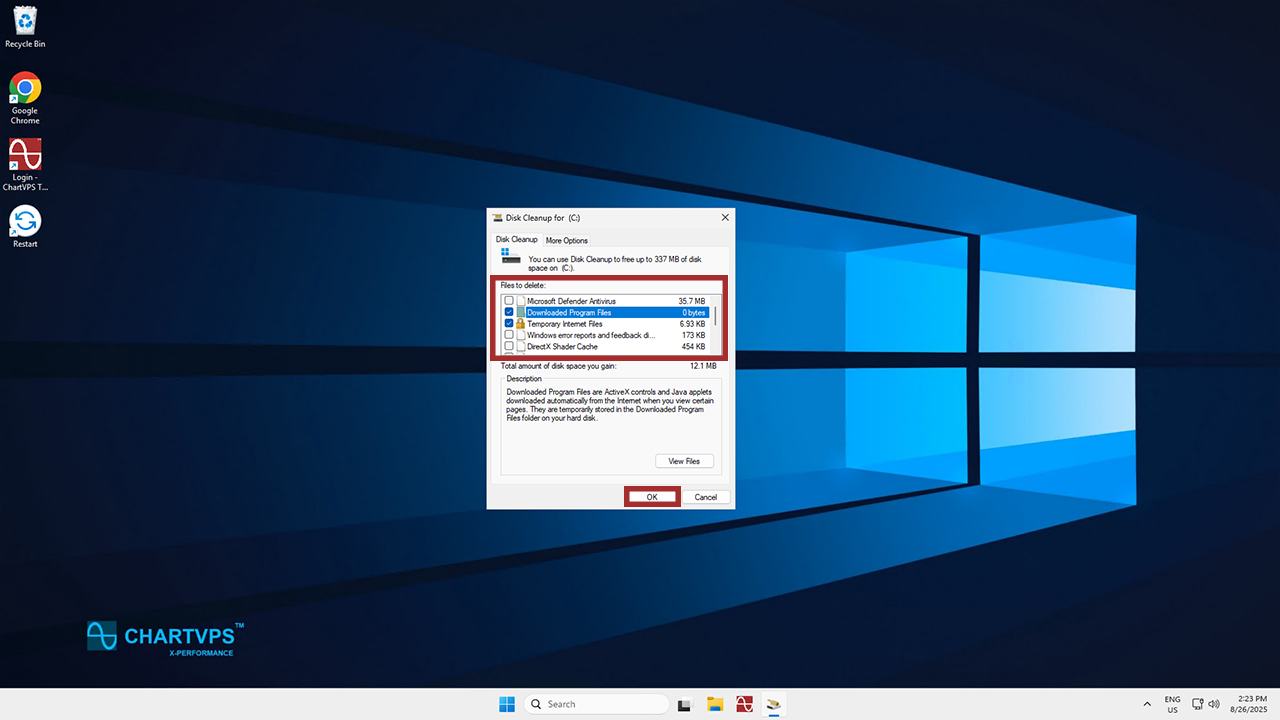
By default, it will scan the C: drive. Then, it will show you the files it could delete to free up some space. Typically, this includes Temporary Files, Thumbnails, and the Recycle Bin. Select the checkboxes for the files you want to remove and click OK.
Solution 2: Clear Trading Platform Data (NinjaTrader & TradeStation)
Trading platforms tend to store large amounts of historical data and backtesting results, which can fill up a disk in no time!
1
As you might have come to expect, you’ll need to use your preferred program to connect to your VPS to begin with.
2
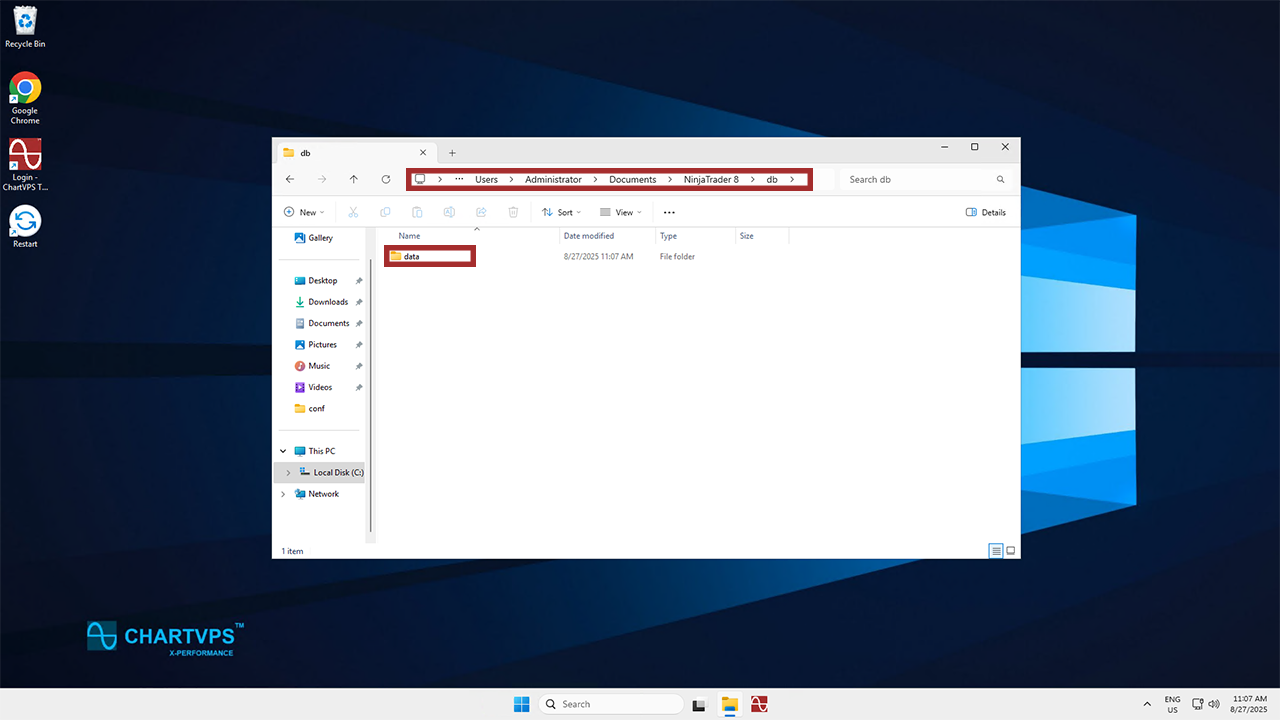
If you use NinjaTrader 8, the default data directory is typically C:\Users\[YourUserName]\Documents\NinjaTrader 8\db\data. Within this folder, you will find files for various markets and symbols, where you can determine which files you can delete. Older, unnecessary historical data files for markets and symbols you don’t trade anymore are normally safe to delete, but be sure to not remove anything linked to what you’re still trading.
3
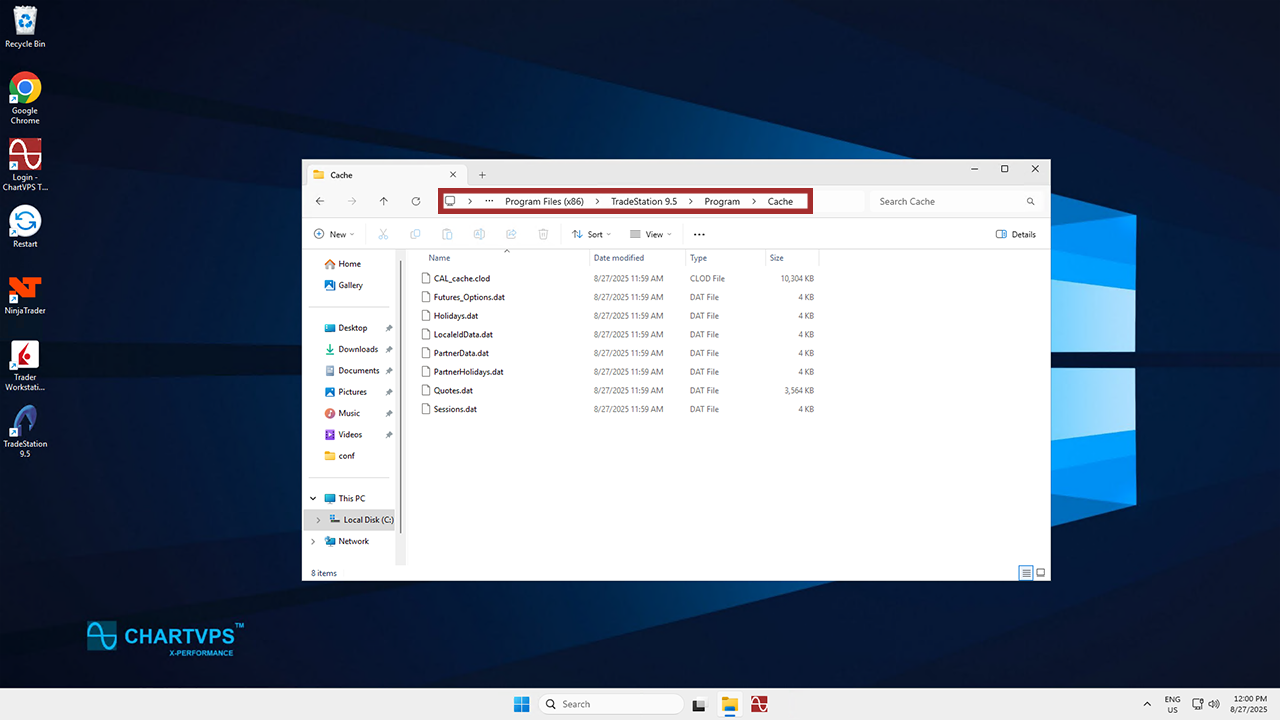
For those of you who use TradeStation, the directory is C:\Program Files (x86)\TradeStation 9.5\Program\Cache. This is a cache of old temporary files. Clearing it out while TradeStation is entirely off while force the program to rebuild the cache from scratch, saving you some space. You could also save the old Cache folder under a different name if you’d like to save it as a back-up, for whatever reason.
Solution 3: Manually Clear IIS Logs and Application-Specific Caches
If you’re running a web server, logs and caches are often the biggest culprits.
1
As with the last solution, you’ve got to access Your VPS. Once again, connect using
Remote Desktop Connection on Windows and the
Windows App on other machines. Remember, if you can’t connect, you may need to use
the ChartVPS Portal to access the server’s desktop.
2
Time to locate the IIS log files. The default location for IIS log files is typically C:\inetpub\logs\LogFiles. To get in there, search for the File Explorer in the Windows search bar, then open it.
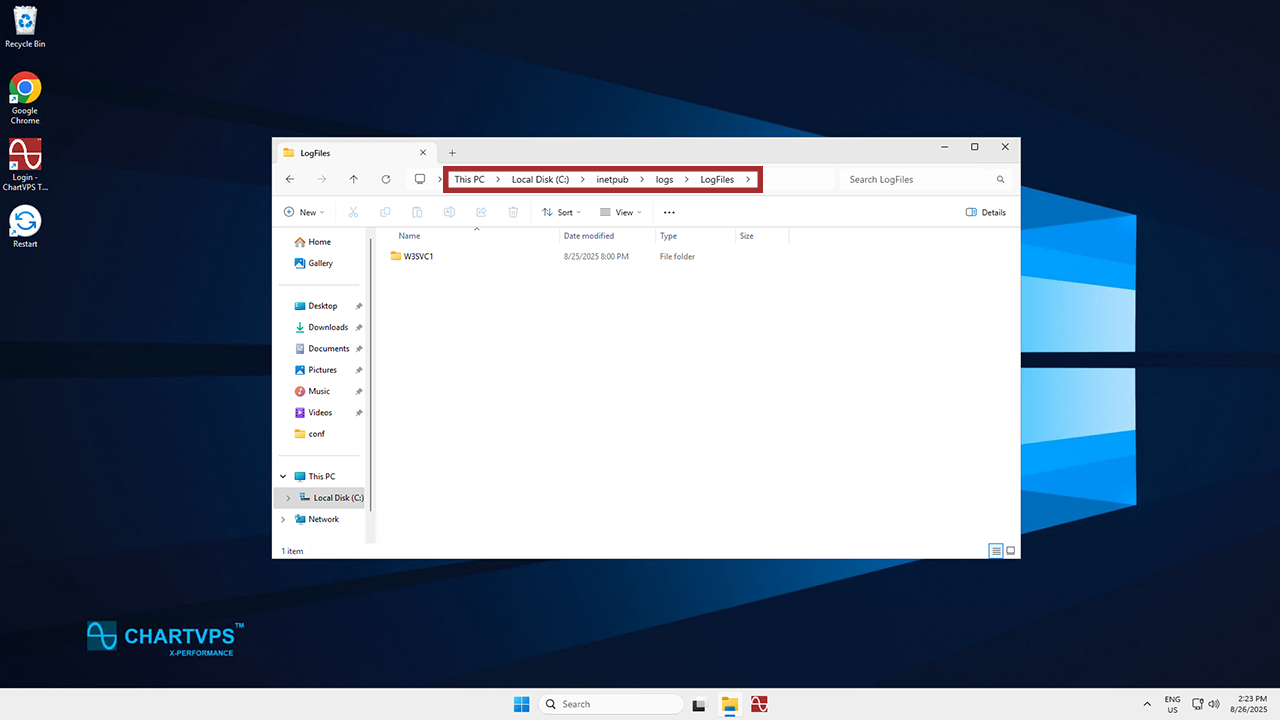
3
The logs are organized by site. You can manually delete older logs (e.g., from previous months or years) to free up space.
4
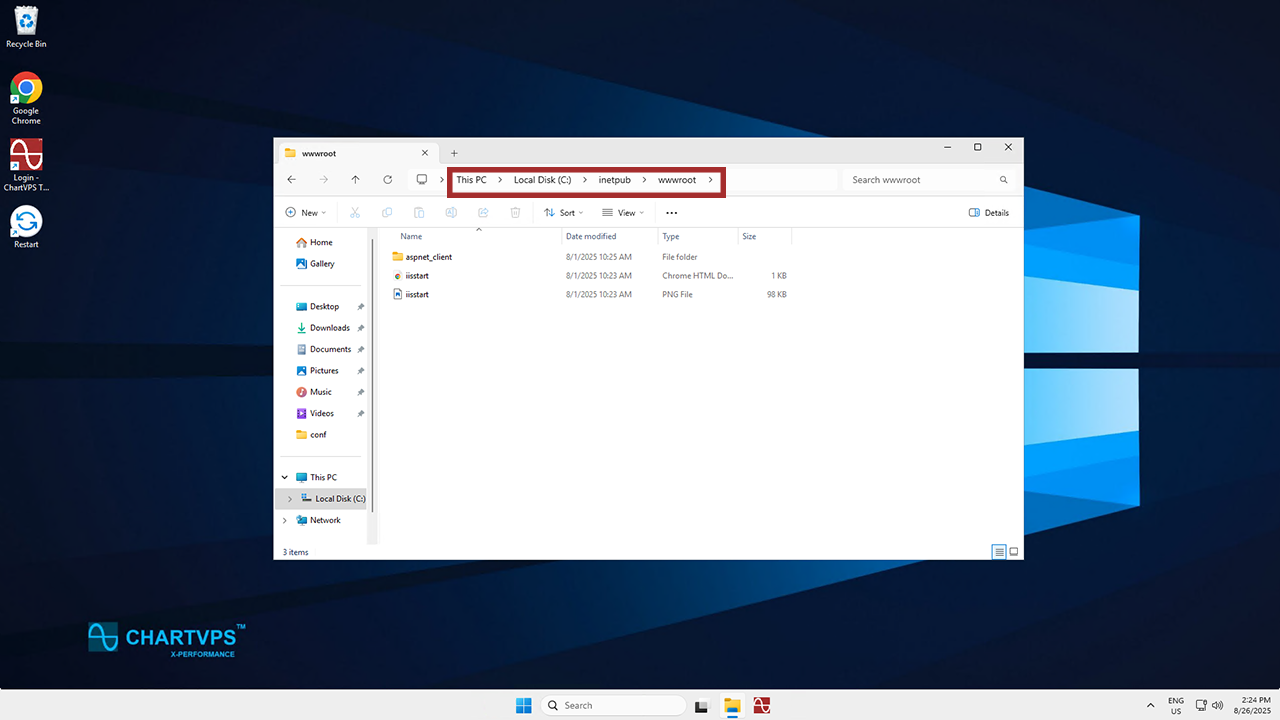
You can also clear application caches. Just find your website’s files (e.g., in C:\inetpub\wwwroot). Look for folders named cache, temp, or logs within your application’s directory (e.g., wp-content/cache for WordPress). You can delete the contents of these folders, but it’s often safer to use your application’s built-in cache-clearing tools if available.
Solution 4: Remove Unused Files
Manually cleaning up large, forgotten files can be highly effective.
1
Again, access your VPS through Remote Desktop Connection or the Windows App.
2
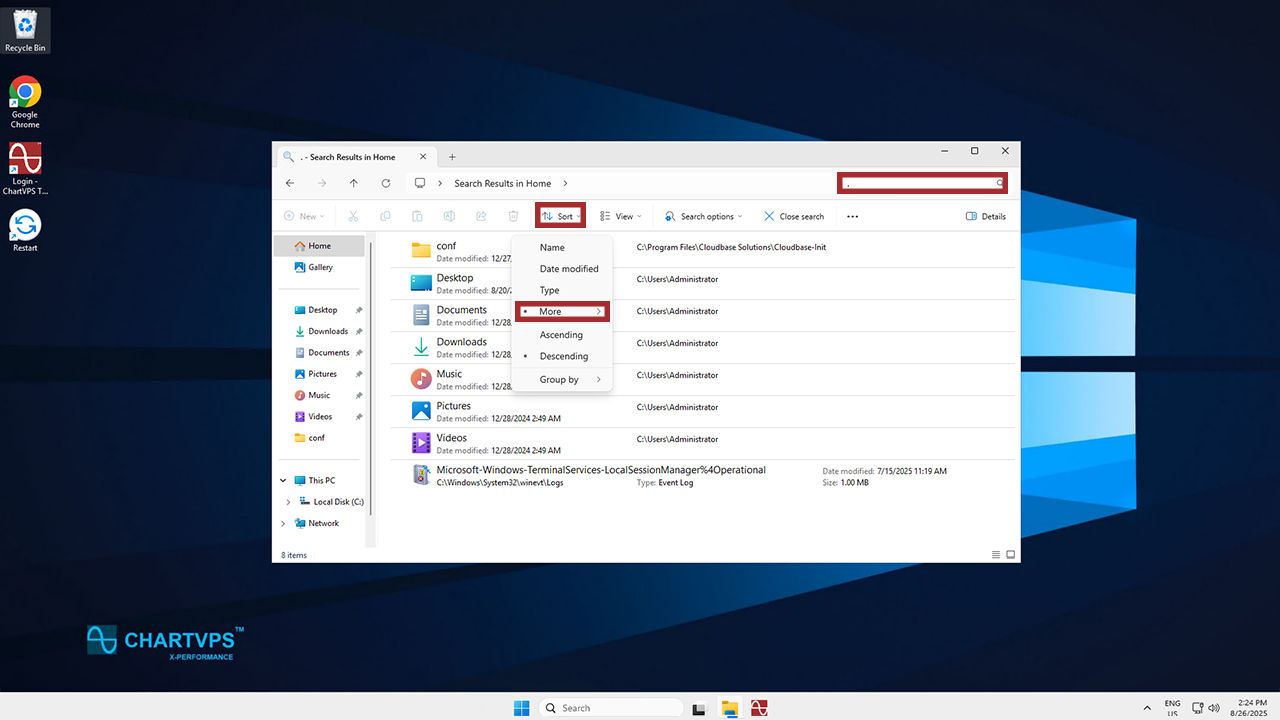
Finding large files can easily be done with a visual tool. You can once more use File Explorer, which features some handy search filters. The quickest and easiest way to go about this is to find the root of your drive, then search for a period (“.”) Then, click Sort and choose to sort the results by Size (descending).
3
Go over the large files you found in the previous step and delete any that aren’t needed for your server’s operation.
If you’re unsure of what files are necessary, don’t hesistate to reach out to
our friendly support team, who are ready to help you 24/7!
Conclusion
A full disk on a VPS can be a serious issue, but there are plenty of ways to resolve the problem. You can use Windows Disk Cleanup, get rid of your unneeded trading platform data, clear IIS logs and app caches, and remove any unused files on your drive. Keep an eye on your storage space after taking these steps, and return to them whenever another clean-up is needed.


