How To Create a Local User on Windows Server 2025

If you’re looking to create a local user account on Windows Server 2025, you’ve found the perfect article! The process is quick and straightforward, so let’s see how it’s done:
1
Right off the bat, you’ve got to find the Server Manager. Hitting the Windows key and “S” will let you search for it, so do that and type in “Server Manager”.

2
Now that you’ve opened the Server Manager, direct your view to the top-right corner of the program. Give the Tools option a click to see a new dropdown menu. From that menu, go ahead and select Computer Management.

3
Time to find the Local Users and Groups section! Since you’re in the Computer Management window, you can expand System Tools, which you’ll find in the left panel. This is where you’ll need to expand the Local Users and Groups option.

4
Here’s the real meat of this guide – it’s time to actually make the local user! Go on and right-click on Users, which is just under Local Users and Groups, and choose New User from the context menu.

5
What’s a user without any details? Fill in the User name, Full name, and the Password (which also has to go in the Confirm Password section). When setting your password, make sure it’s secure and follows any password policies your organization may have!
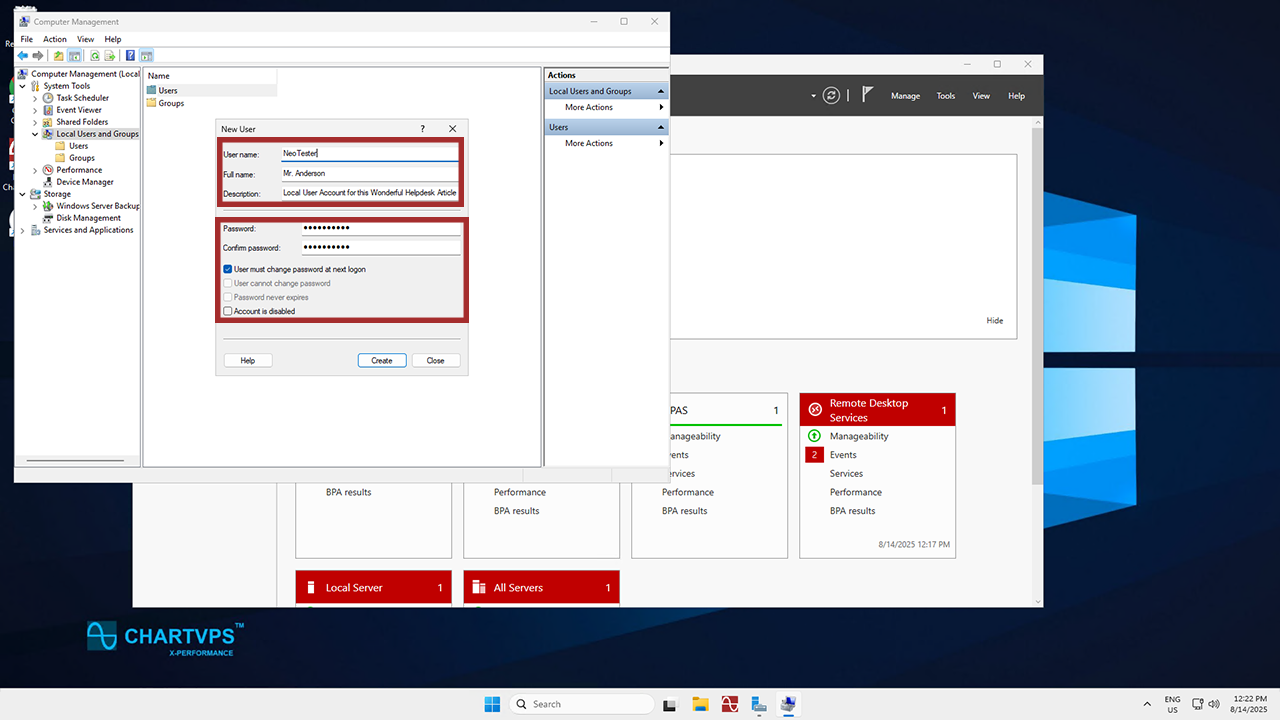
  • To simplify the login process going forward, feel free to uncheck the User must change password at next logon checkbox. Do that if you want to set a specific password without requiring the local user to change it upon login. Leaving this option checked is more work, as the first log-in password change isn’t supported via remote desktop, so it would have to be done through the ChartVPS Portal’s server web console.

  • As for the other options listed there, you can also choose to enable or disable the User cannot change password and Password never expires options. These do just as they say and can be enabled or disabled here at your discretion. No matter what options you choose, the process ends the same – just click Create when you’re satisfied with the details you’ve filled in.

6
This step is optional, but handy nonetheless! If you need to assign your new user to specific groups or grant them any additional permissions, simply right-click the user you just created under Users and choose Properties.

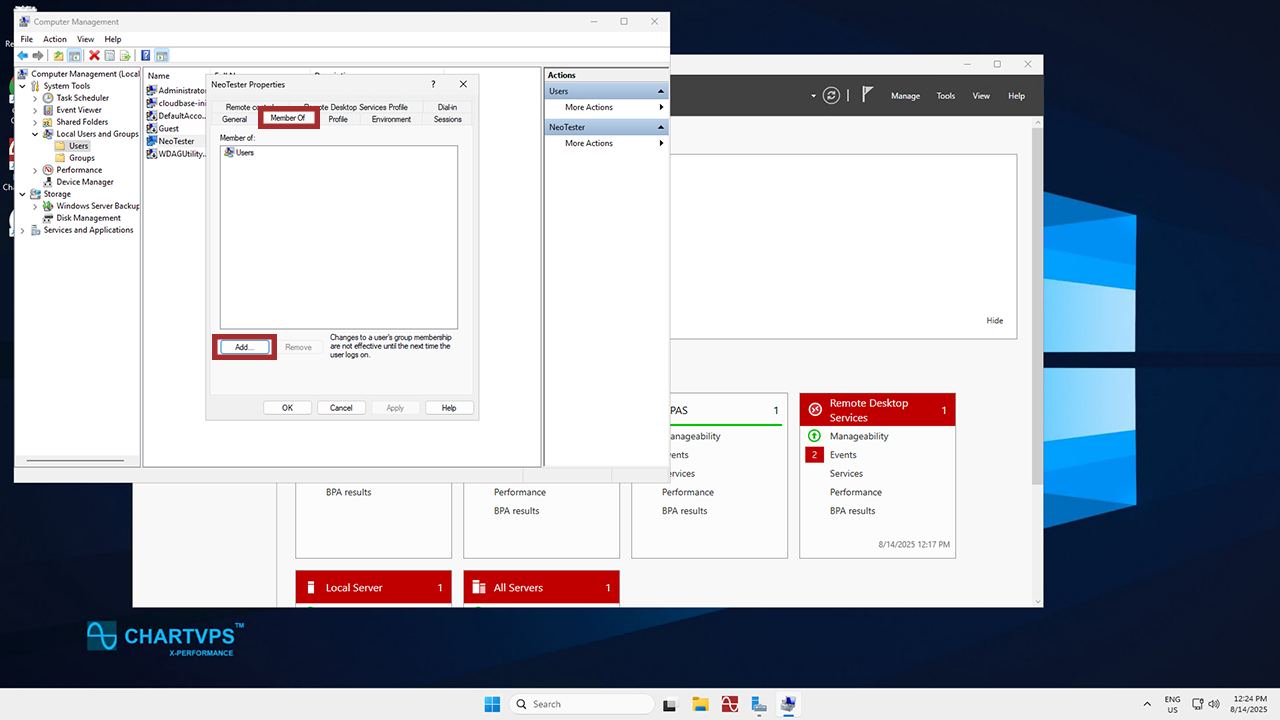
  • Within the Properties window you just opened, go to the Member Of tab to add the user to whatever groups are relevant.

And that’s that! You’ve successfully created a local user account on Windows Server 2025. The user you’ve made can now use the provided username and password to log in to the server, provided it follows any password policies or group memberships you’ve set up.

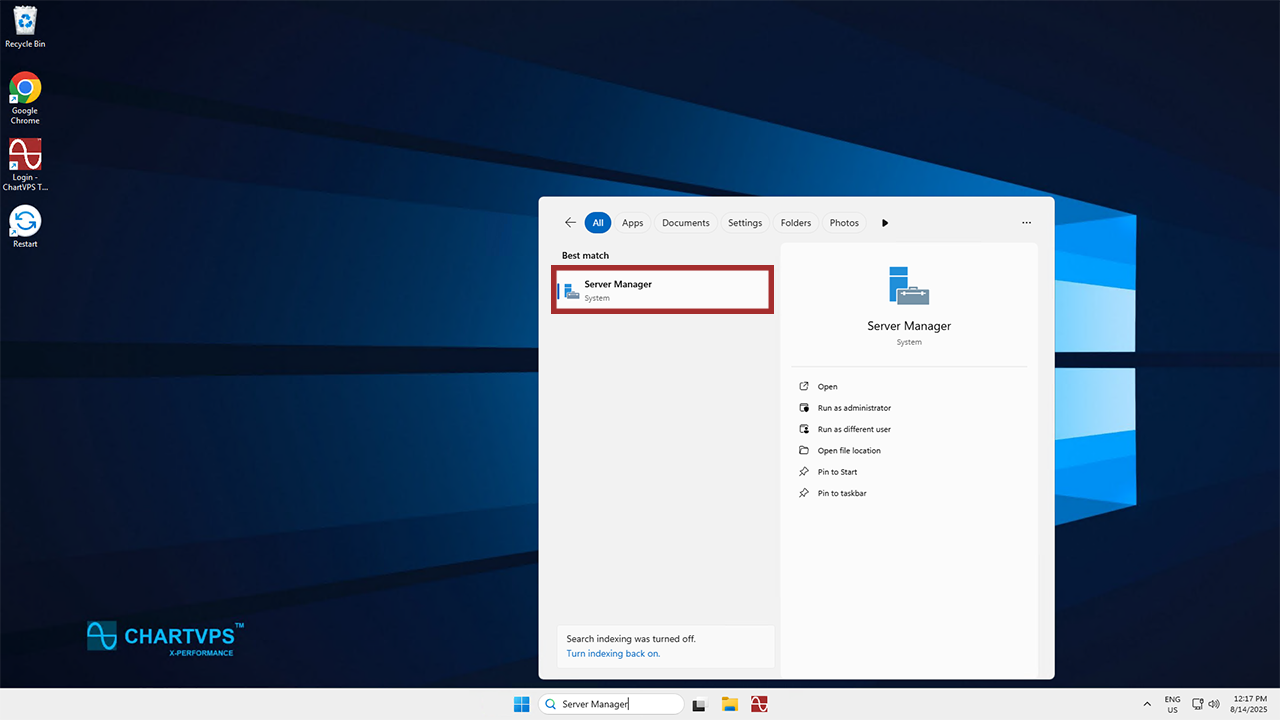
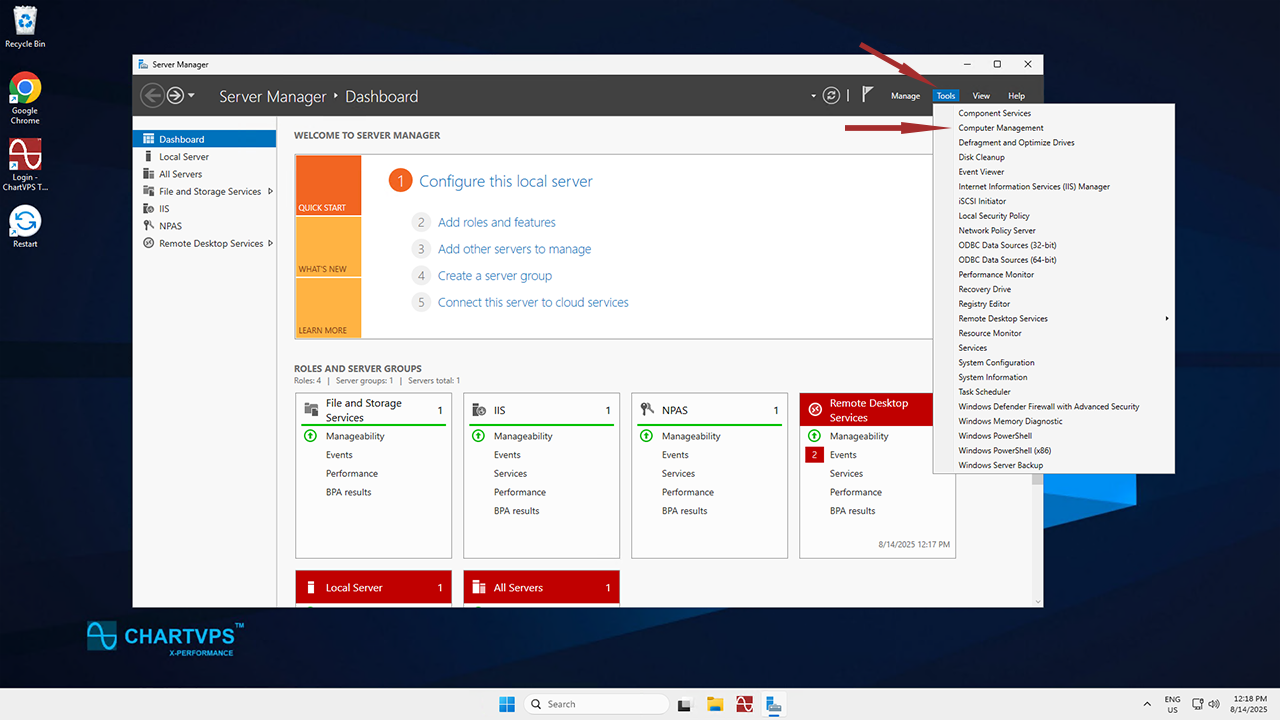
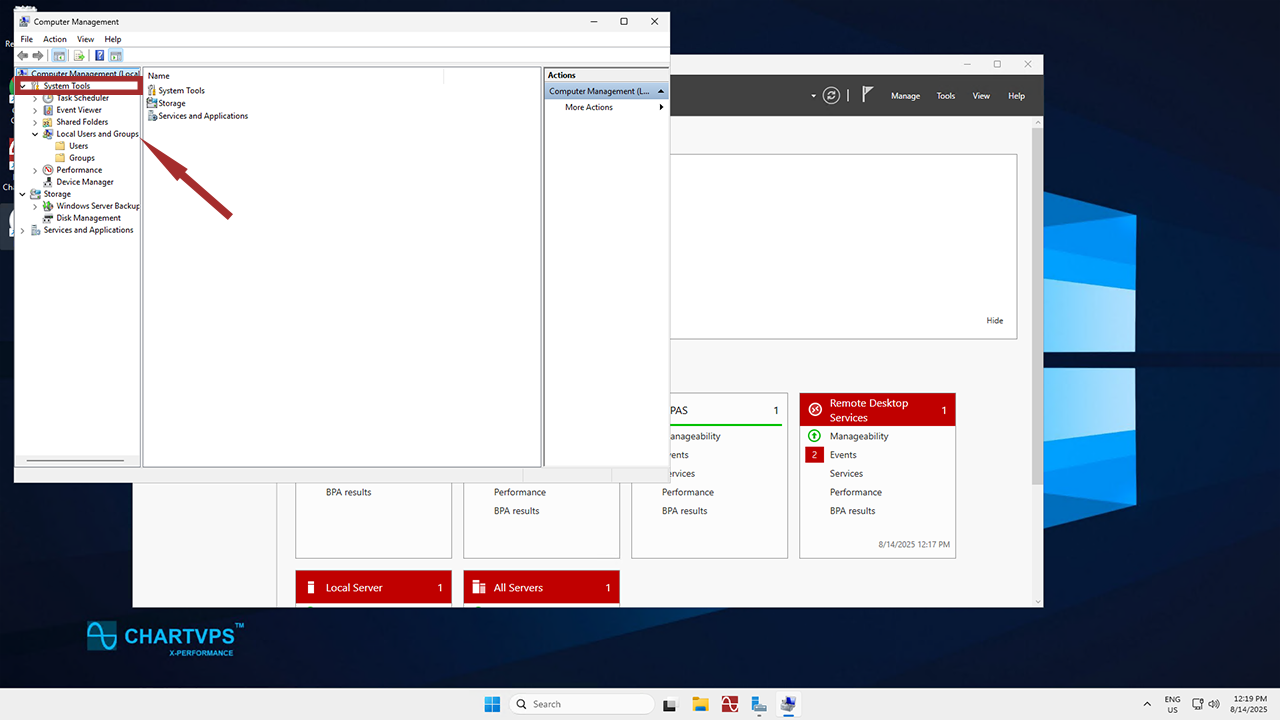
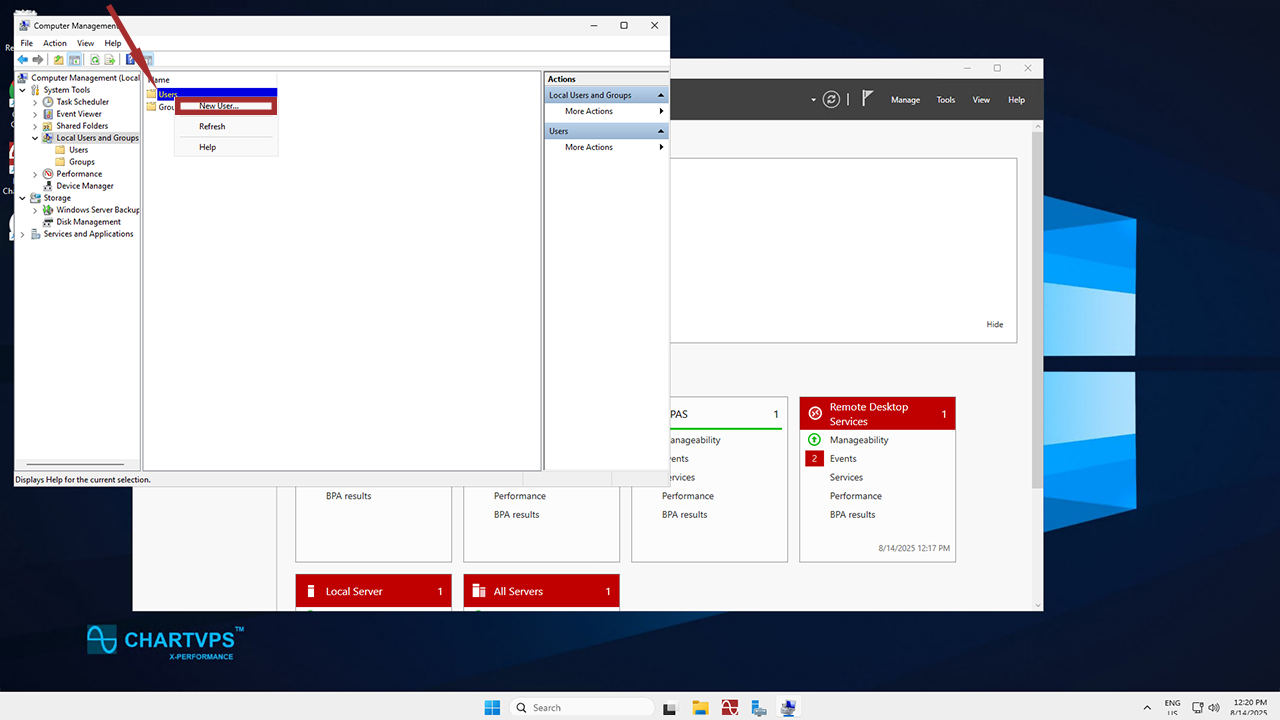
How to create a local user on Windows Server 2025

Was this article helpful?

Job Post Form Pop up

[mepr-membership-registration-form id="13707"]
[mepr-membership-registration-form id="13708"]
[mepr-membership-registration-form id="13633"]
[mepr-membership-registration-form id="13635"]
[mepr-membership-registration-form id="13634"]
We value your privacy
We use cookies to enhance your browsing experience, serve personalized ads or content, and analyze our traffic. By clicking "Accept All", you consent to our use of cookies.
Reject All
Accept All
Customize
We value your privacy
We use cookies to enhance your browsing experience, serve personalized ads or content, and analyze our traffic. By clicking "Accept All", you consent to our use of cookies.
Reject All
Accept All
Customize