It’s never a bad idea to make it harder for unwanted visitors to try and attack your system. One way of doing that is by changing the default Remote Desktop Protocol (RDP) port. We’re going to get into how you can do this yourself in this article. Of course, this is just one layer of security, and it works best alongside other safety measures – never underestimate the power of a strong password!
Tip
Setting Firewall Rules
First things first – you’ve got to set up some firewall rules. This will involve making an inbound rule, so take a deep breath – we’re diving in.
Create an inbound port rule
An inbound port rule allows any program that listens on a specified TCP (Transmission Control Protocol) or UDP (User Datagram Protocol) port to receive network traffic sent to that port. If that sounds like a bit much, not to worry – creating an inbound port rule is pretty straightforward:
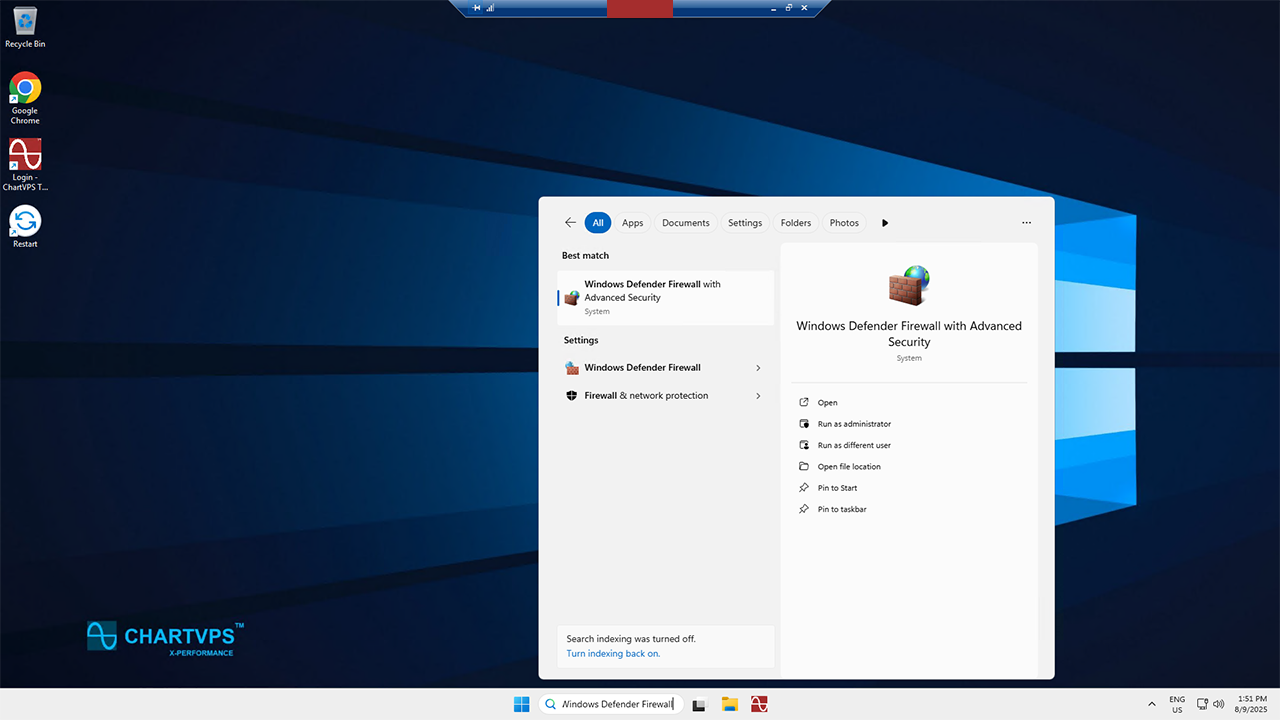
1To start, search for Windows Defender Firewall in the Windows menu and click it.
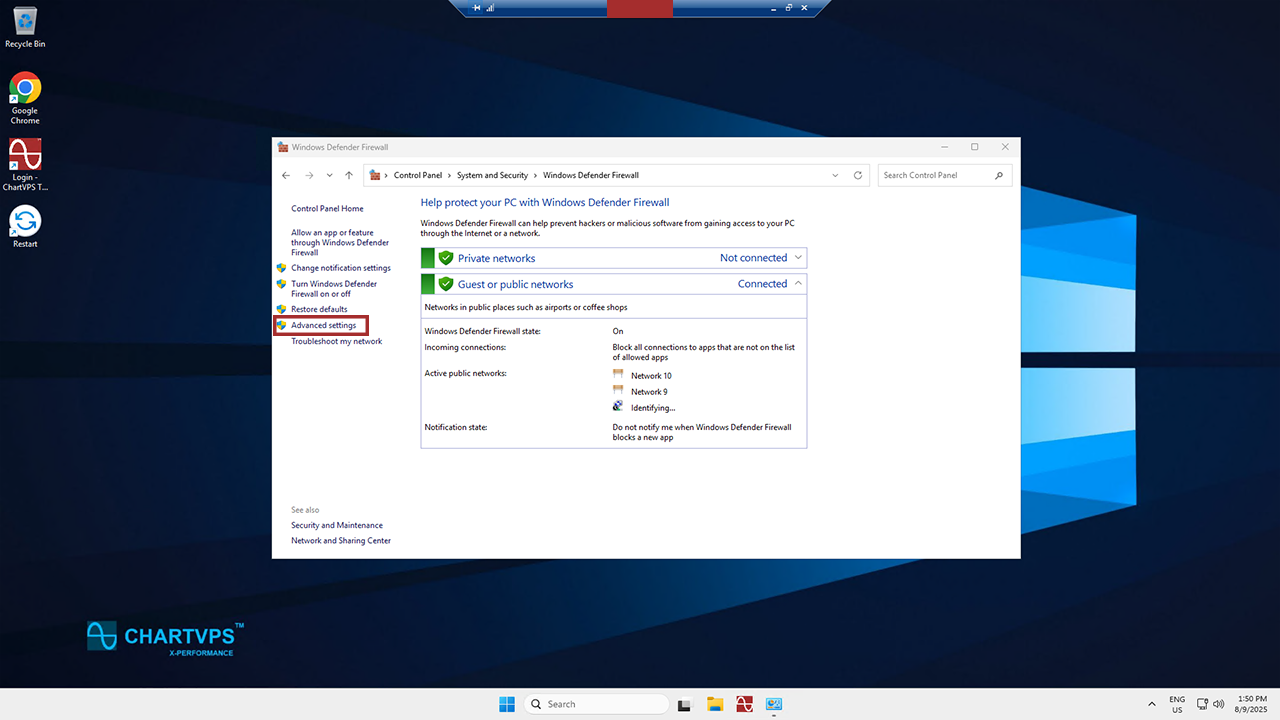
2Look to the left – click the Advanced Settings option.
3Now you’re in the Advanced Settings. From there, look left again and select Inbound Rules.
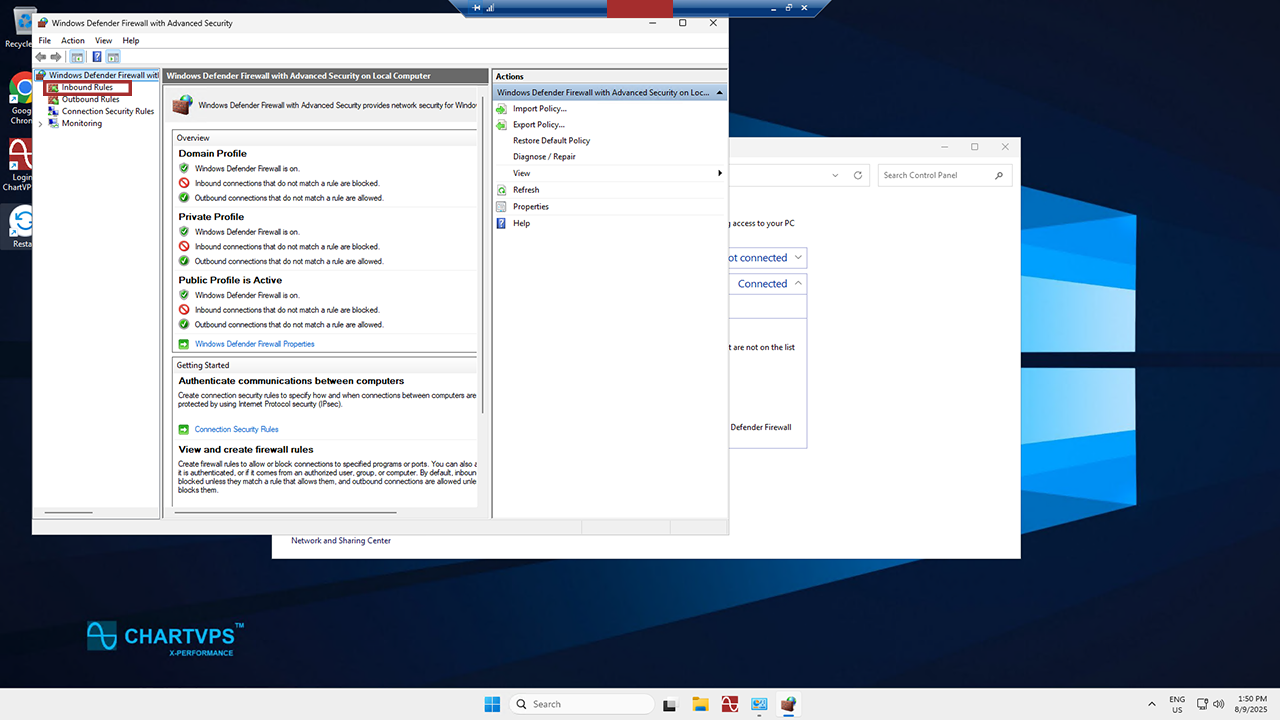
4Click Action from the bar at the top, then select New Rule.

5From the Rule Type page of the now-open New Inbound Rule Wizard, hit Custom, and then Next.

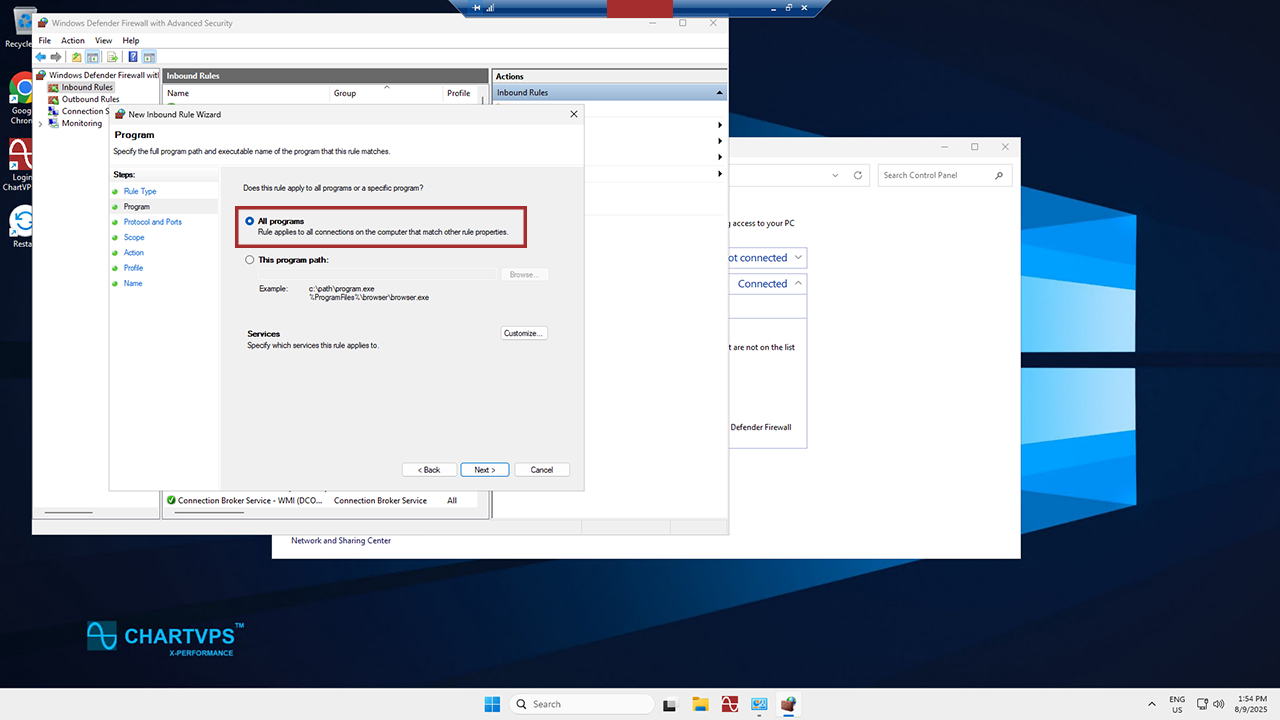
6This brings you to the Program page. Select All Programs, and then Next.
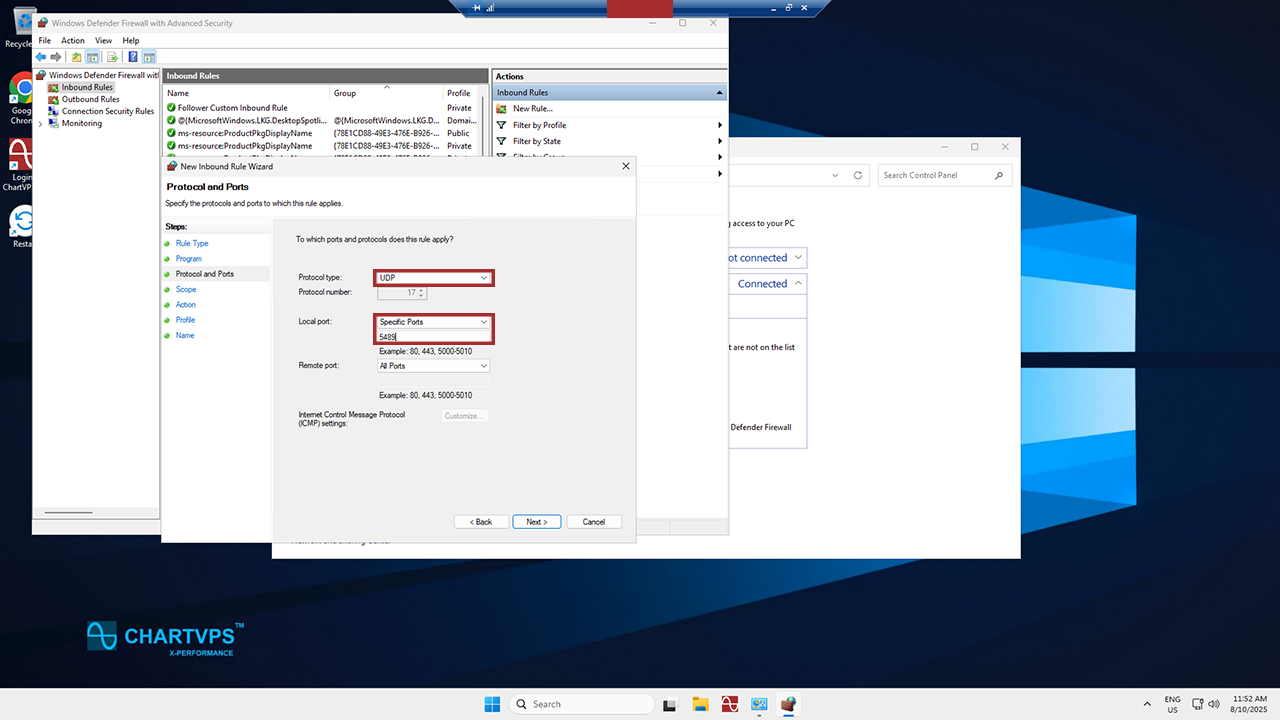
7Things get a bit more complex on the Protocol and Ports page. Here, select the protocol type that you want to allow. To restrict the rule to a specified port number, you’ve got to select either TCP or UDP from the Protocol Type dropdown menu. Since this is an incoming rule, you usually configure only the local port number. If you select another protocol, then only packets whose protocol field in the IP header match this rule are permitted through the firewall. If you want to select a protocol by its number, just select Custom from the list, and then type the number in the Protocol number box. When you have configured the protocols and ports, select Next.
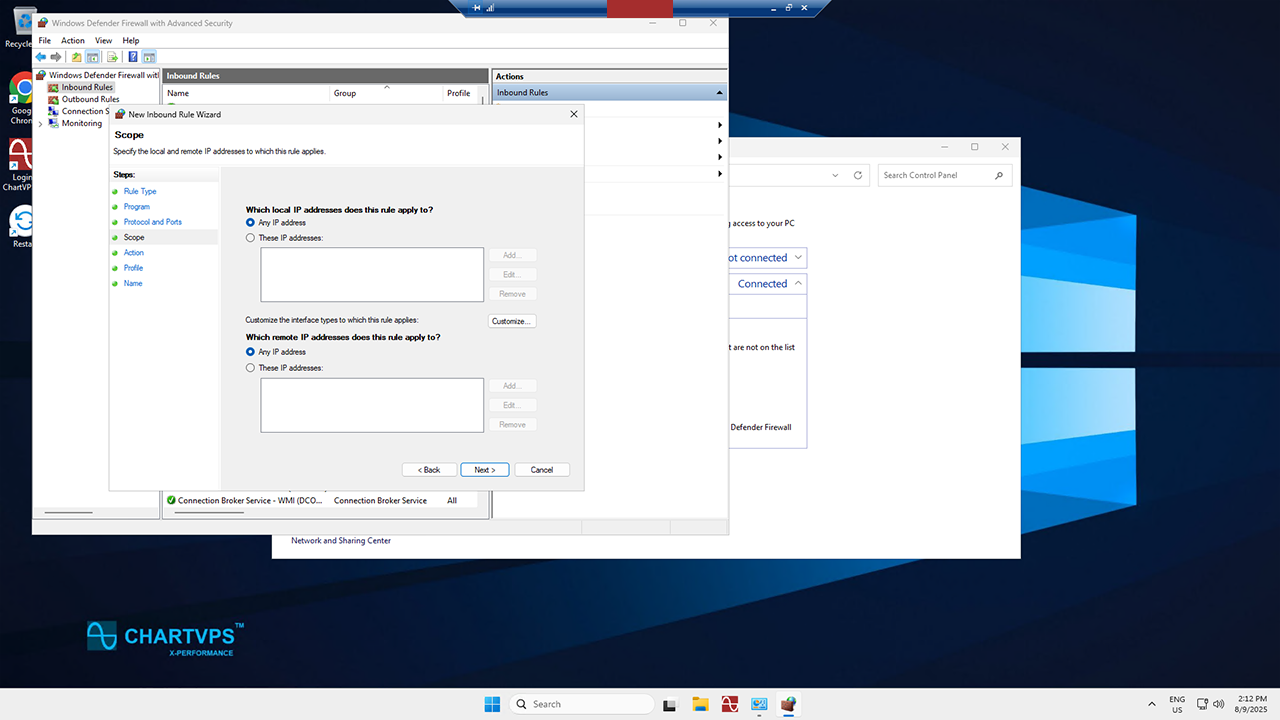
8Here we are on the Scope page, where you can specify whether the rule applies only to network traffic to or from the IP addresses entered on this page. Configure it in the way that best works for what you’re going for, then hit Next.
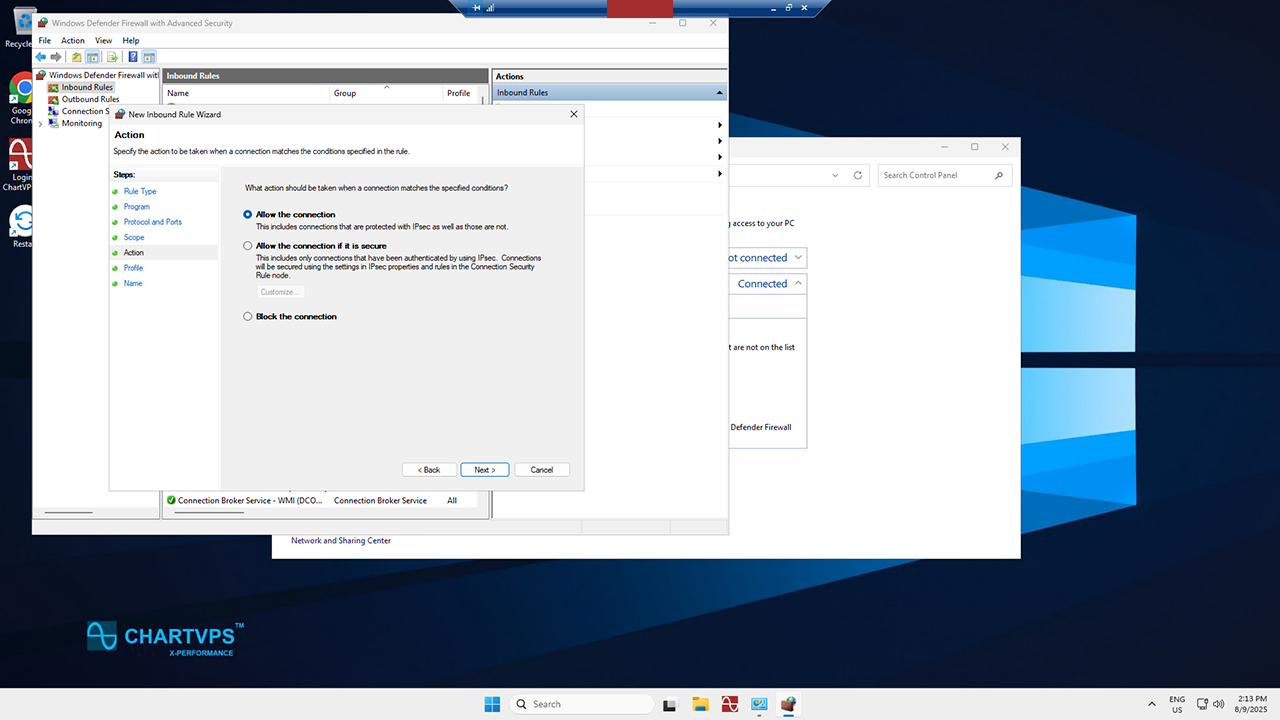
9Welcome to the Action page! Select Allow the connection and hit Next once again.
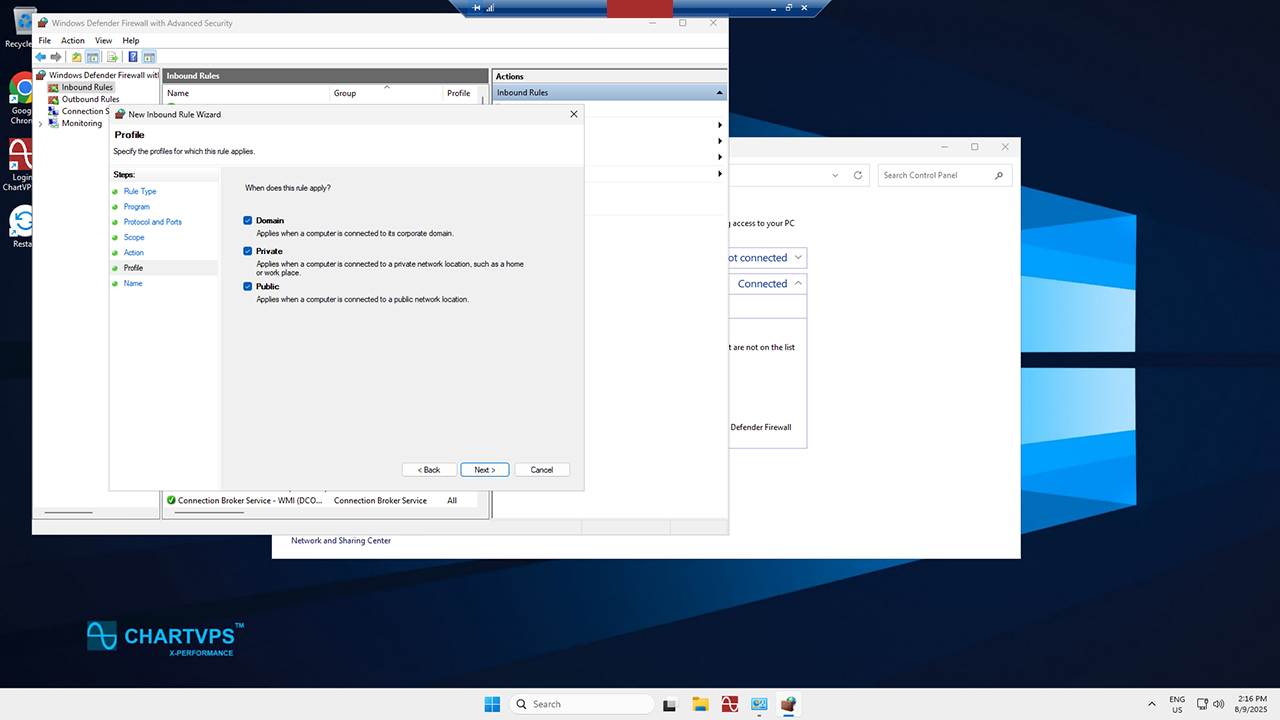
10Second to last, it’s the Profile page. Pick the network location types that you want this rule to apply to, then click Next.
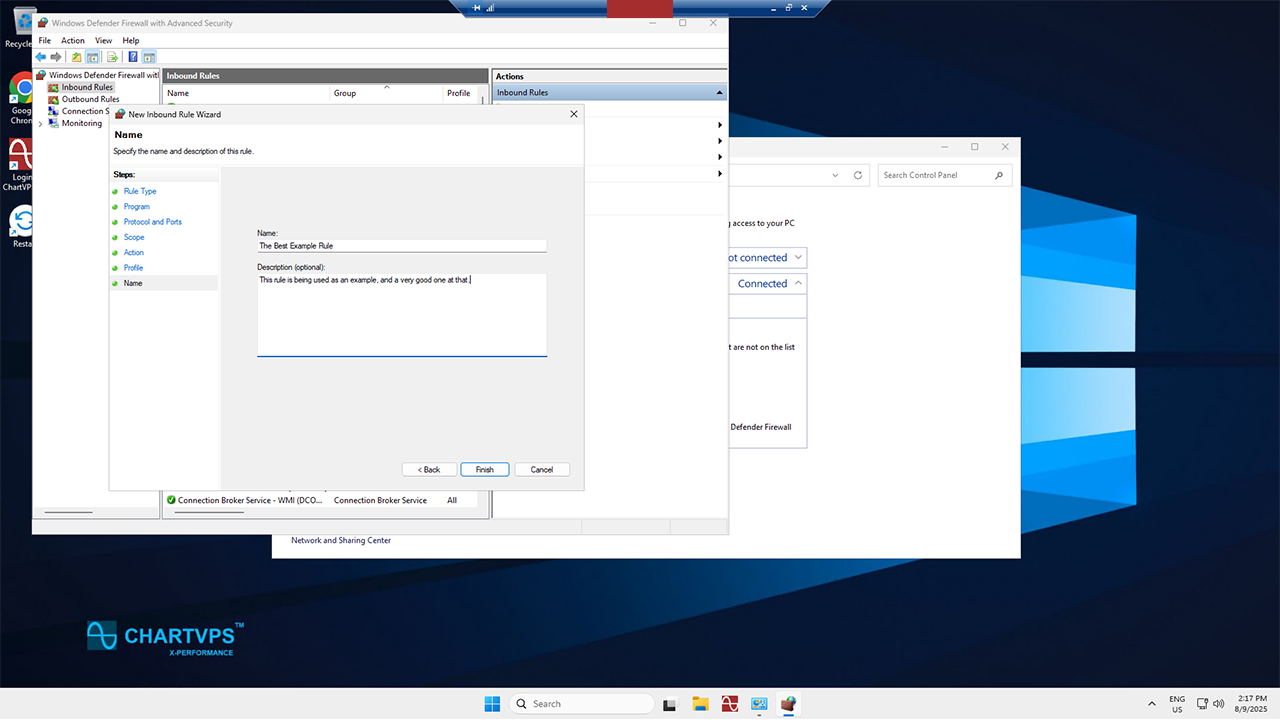
11Finally, we’ve hit the Name page. Give your rule a name and description and select Finish!
Choose a New Port Number
That’s enough about rules! Before proceeding, you’ll need to pick a new port number to use. We’d recommend avoiding common or well-known ports (0-1023) as well as registered ports (1024-49151). Instead, choose a port in the dynamic/private range (49152-65535). This reduces the likelihood of issues or conflicts!
Alert
Configuring the remote port
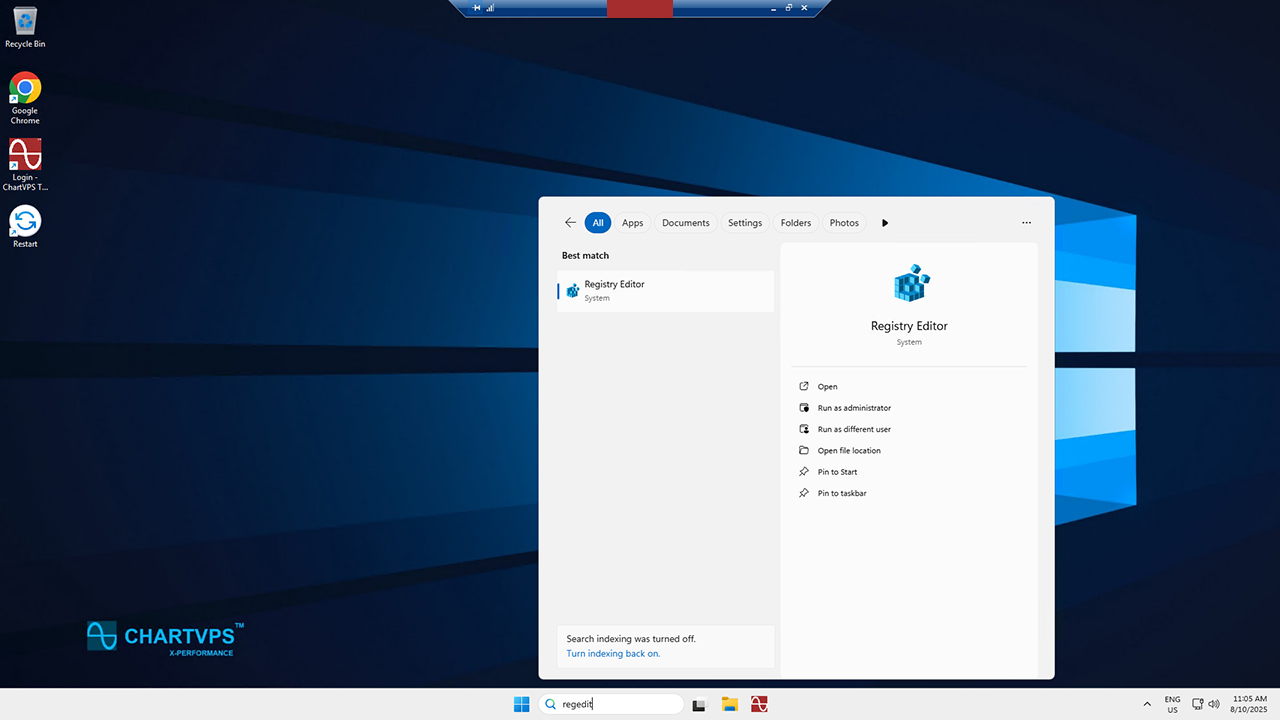
1Time for something new: search for and open the Registry Editor. The easiest way to do this is to just type regedit in the Windows search menu.
2Copy and paste the following registry subkey into the address bar at the top, then press Enter:
HKEY_LOCAL_MACHINE\System\CurrentControlSet\Control\Terminal Server\WinStations\RDP-Tcp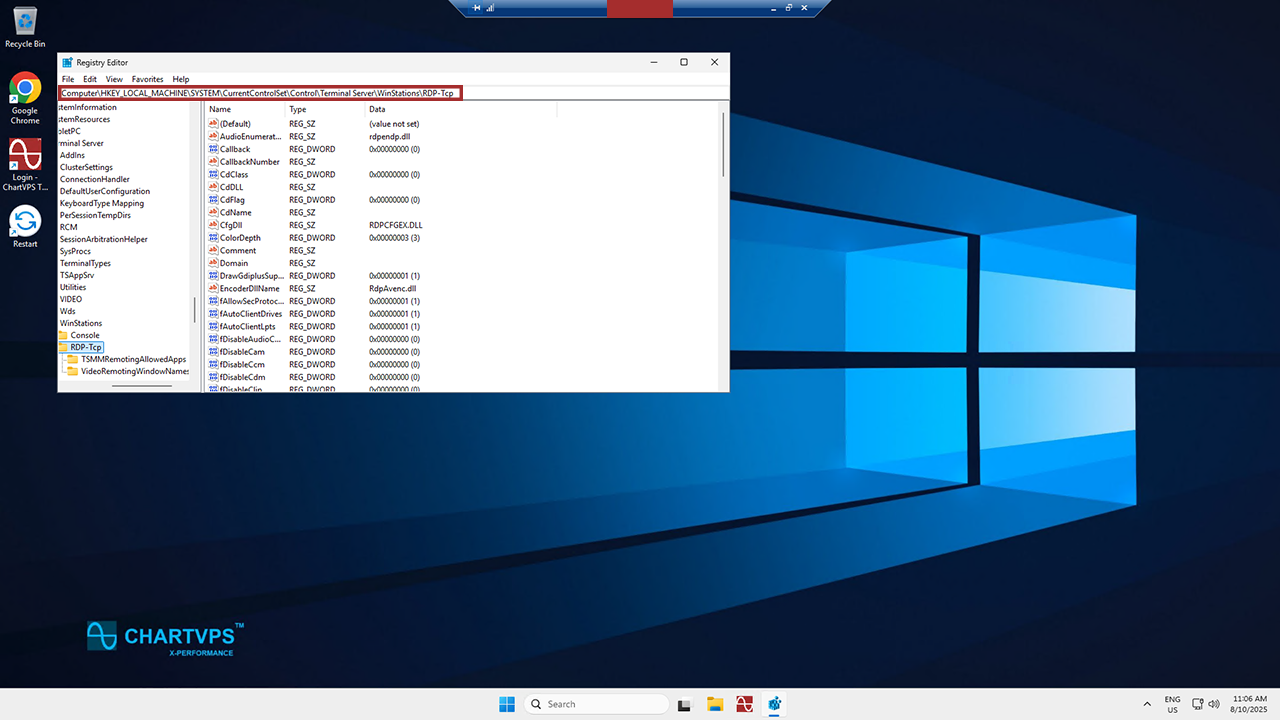
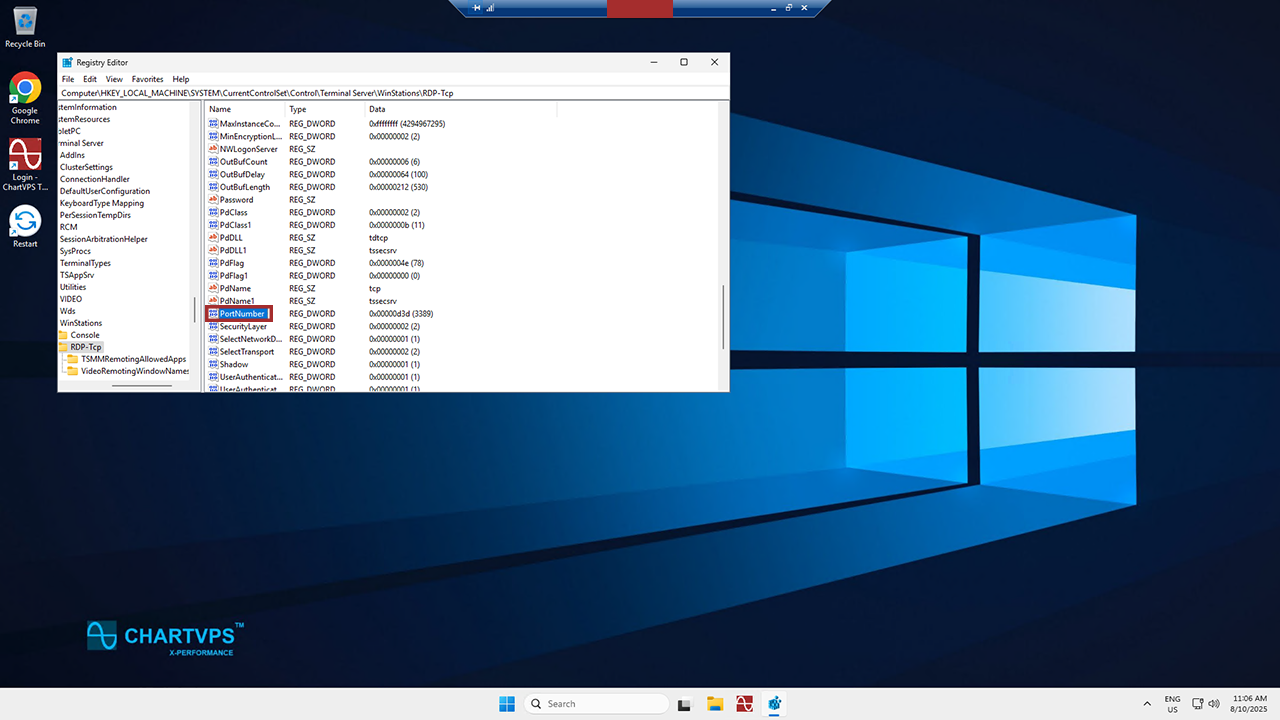
3This is where you’re going to want to find PortNumber and highlight it with a click. The list should be alphabetical by default, so just steer on over to the “P” section.
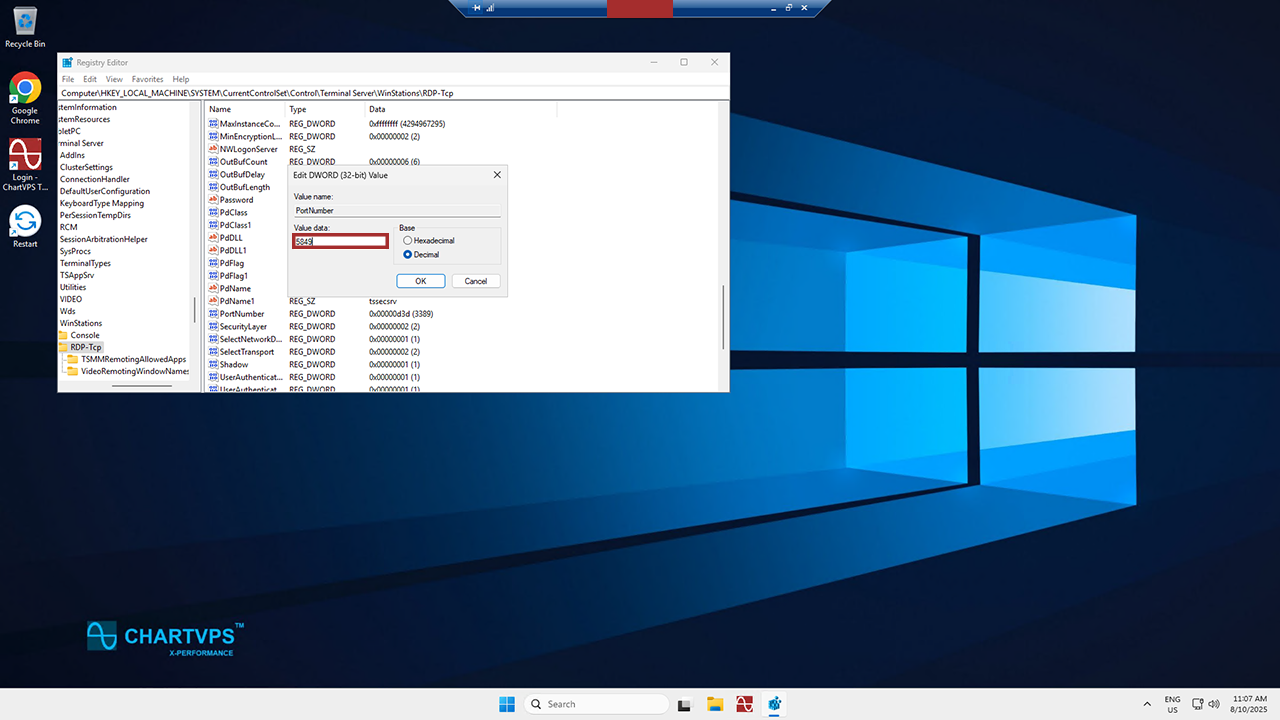
4Click Edit on the toolbar, then the Modify option. Now that you’re in the Modify menu, just click Decimal.
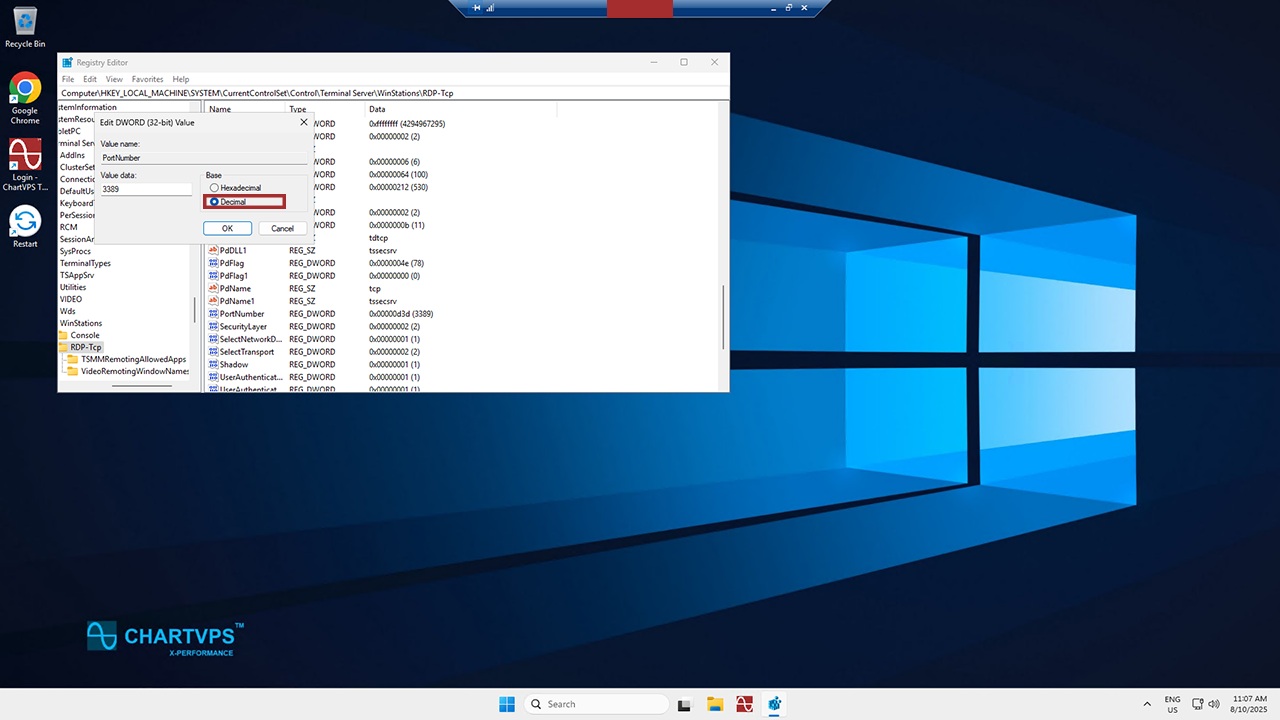
5This is the time to type your new port number in. Finally, hit OK.
6With that, you’re done with the Registry Editor! Go ahead and close it, and restart your server.
Connecting to your server after setting the custom port
1Time to log into your server with the new rules and custom port in place! As you might know, you’ve got to open the Remote Desktop Protocol app on your own computer.
2Enter your IP address in the Computer field, followed by a colon, then your custom port number, like this example:
- 111.111.1.1:54892
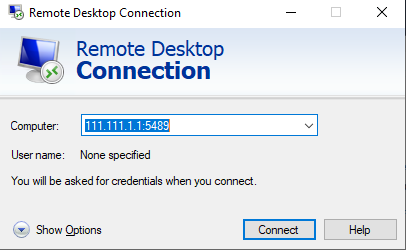
3Click Show Options, enter your usual login info, and hit Connect. Congratulations – you’re now visiting your even safer server!