


This helpdesk article is for macOS users running macOS 12.0 (Monterey) or later. It shows you how to install the Windows app, the updated version of Microsoft Remote Desktop, to connect to remote Windows computers.
1
Before connecting, you’re going to need your server’s credentials. You can find these over on the ChartVPS Portal, which you can access from your preferred web browser. All you’ve got to do is enter your email address and password into the Portal, and you’ll be able to find your credentials. We’re looking for your server’s IP Address, your User name, and your password – make sure to keep this info on hand for a later step!
2
Now then, simply open the App Store on your device and search for the Windows App.
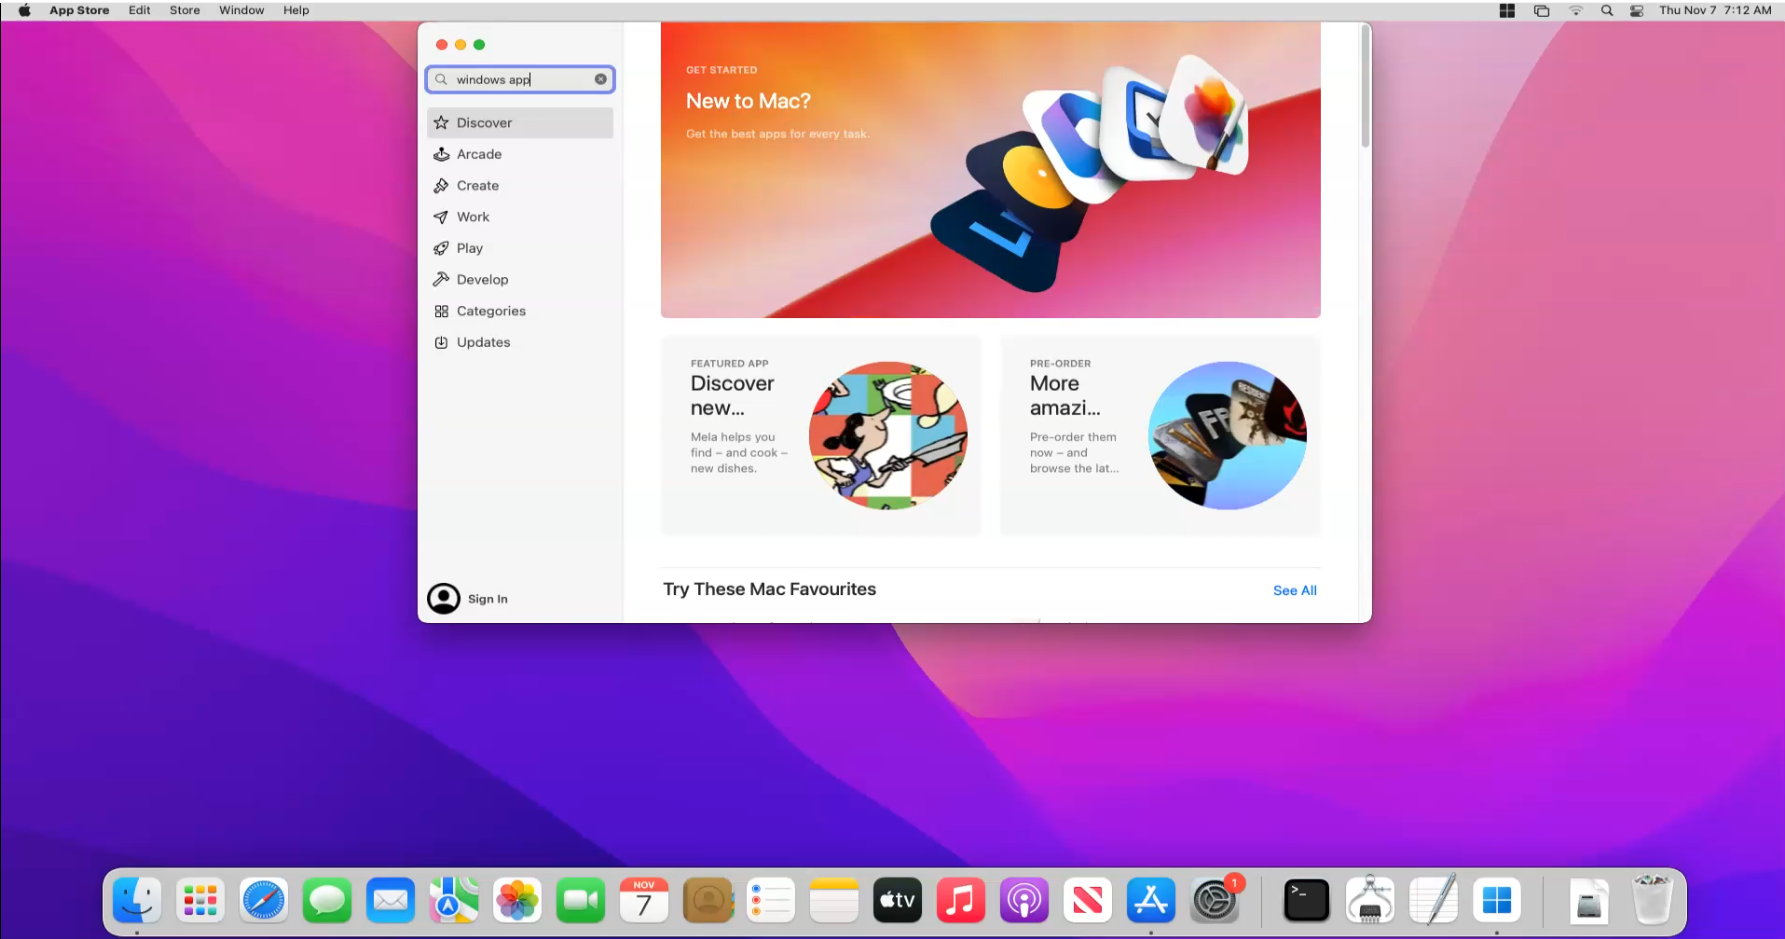
3
Once you’ve found it, you just have to click the Get button, then tap Install.
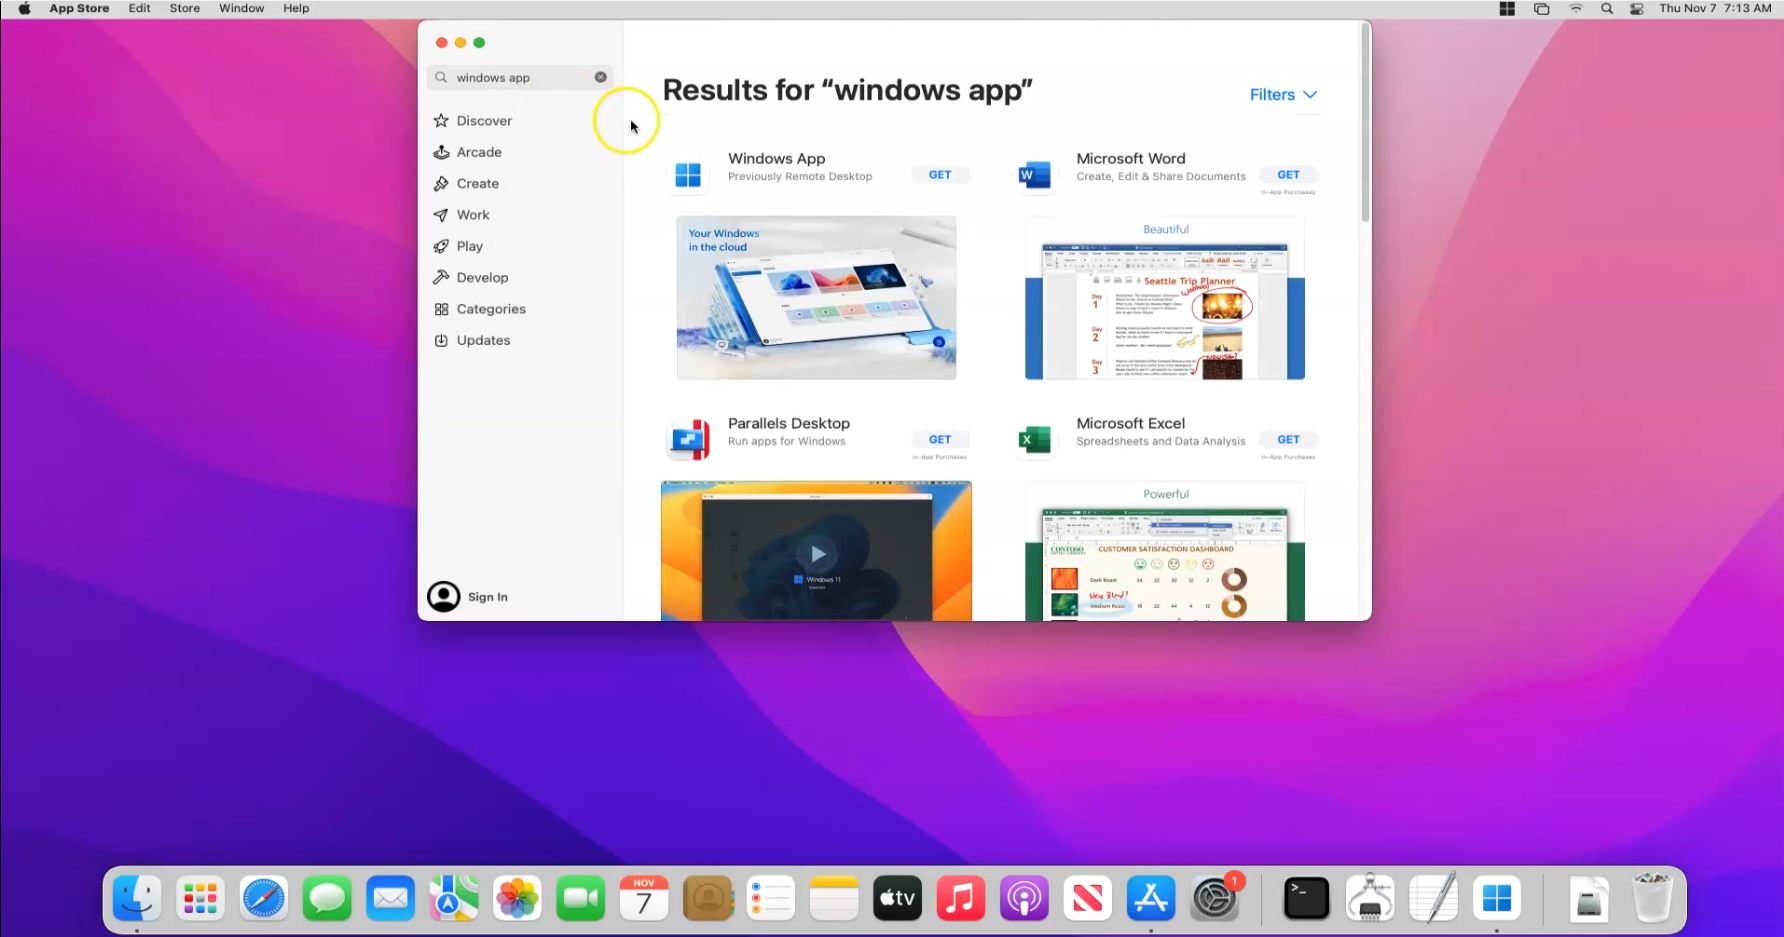
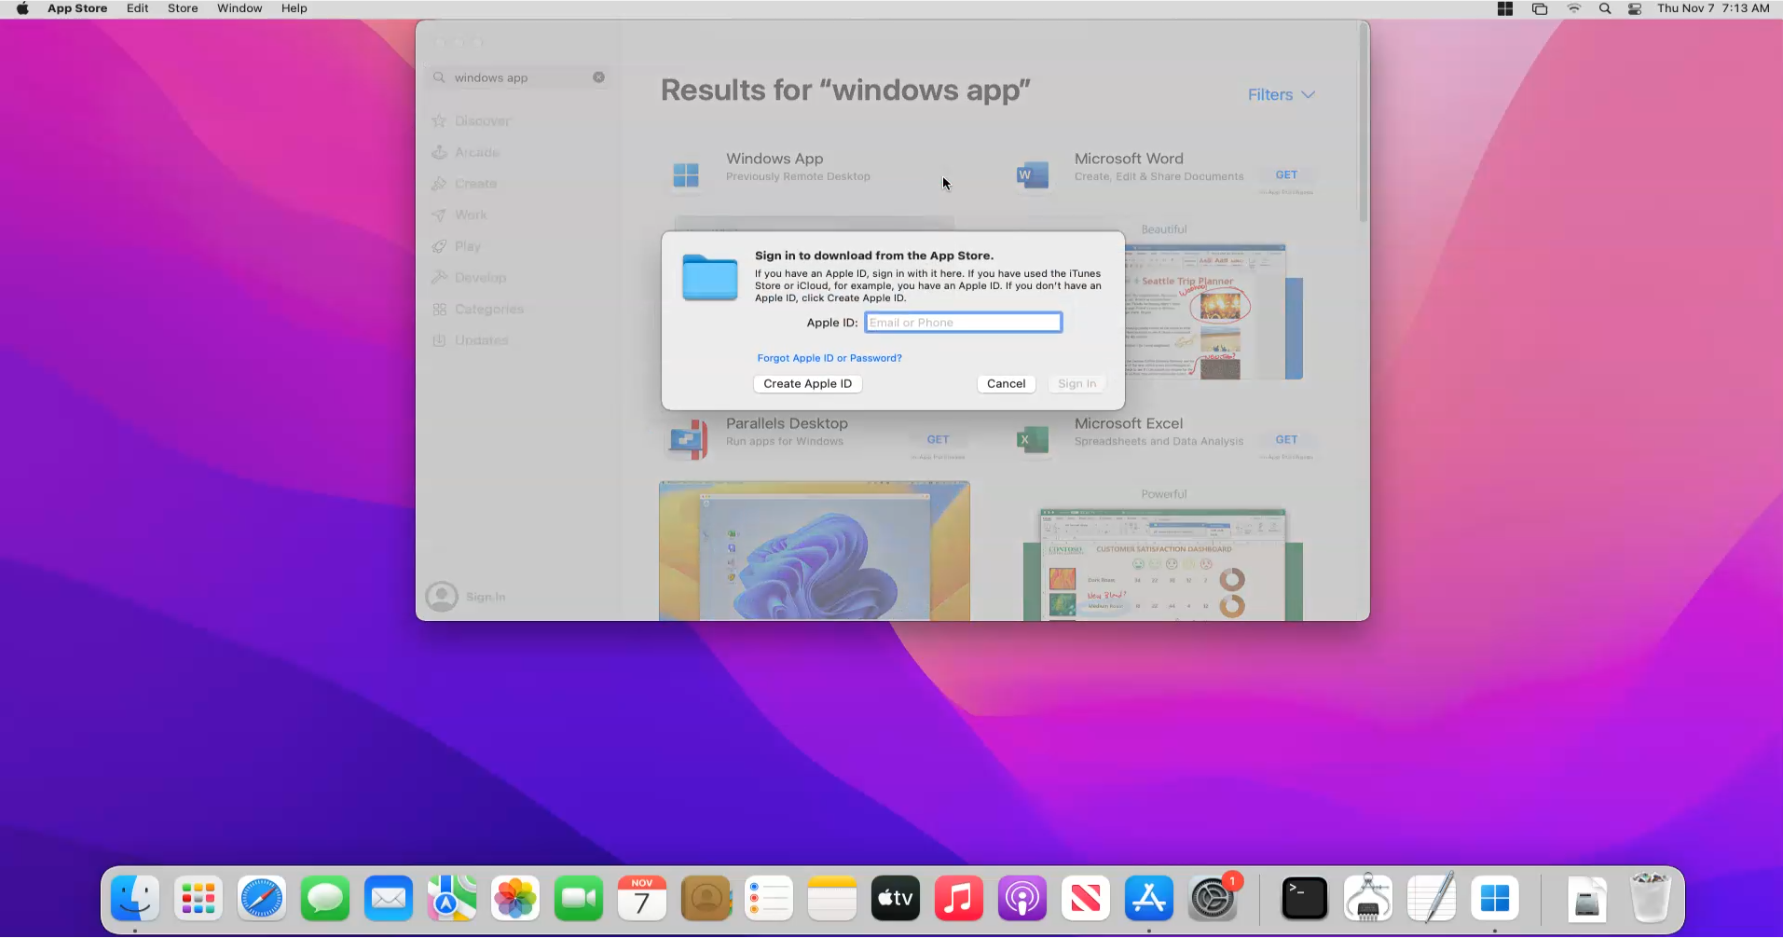
If you’re not already signed into the App Store, you’ll be asked to enter your Apple ID and password before you can download and install the app.
4
After it’s installed, you can find the Windows App by clicking the magnifying glass icon in the top-right corner of your screen (it should be next to the date and time).
- A search box will appear—type Windows App and select it from the search results.
Make sure you have those server details we got from the ChartVPS Portal in Step 1 handy before we continue!
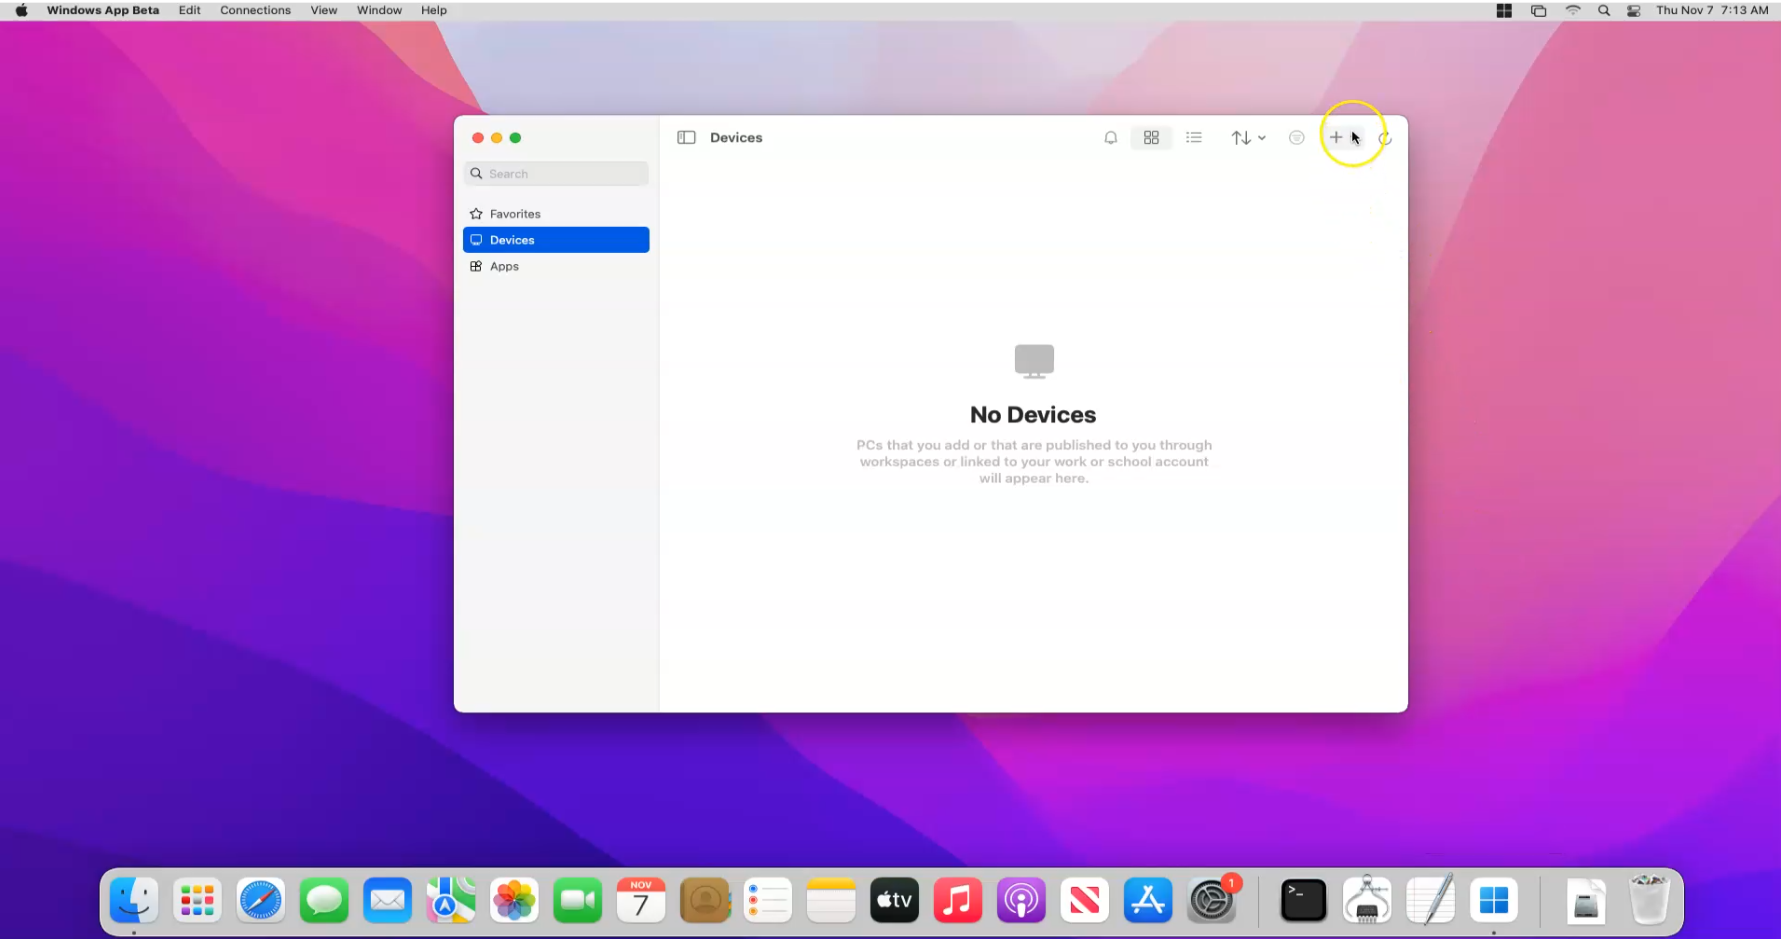
5
In the Windows App, click the plus (+) icon at the top-right corner and select Add PC.
6
Now that you’re on the Add PC screen, go ahead and copy the IP address of your server you got from the ChartVPS Portal and paste it into the PC name field.

7
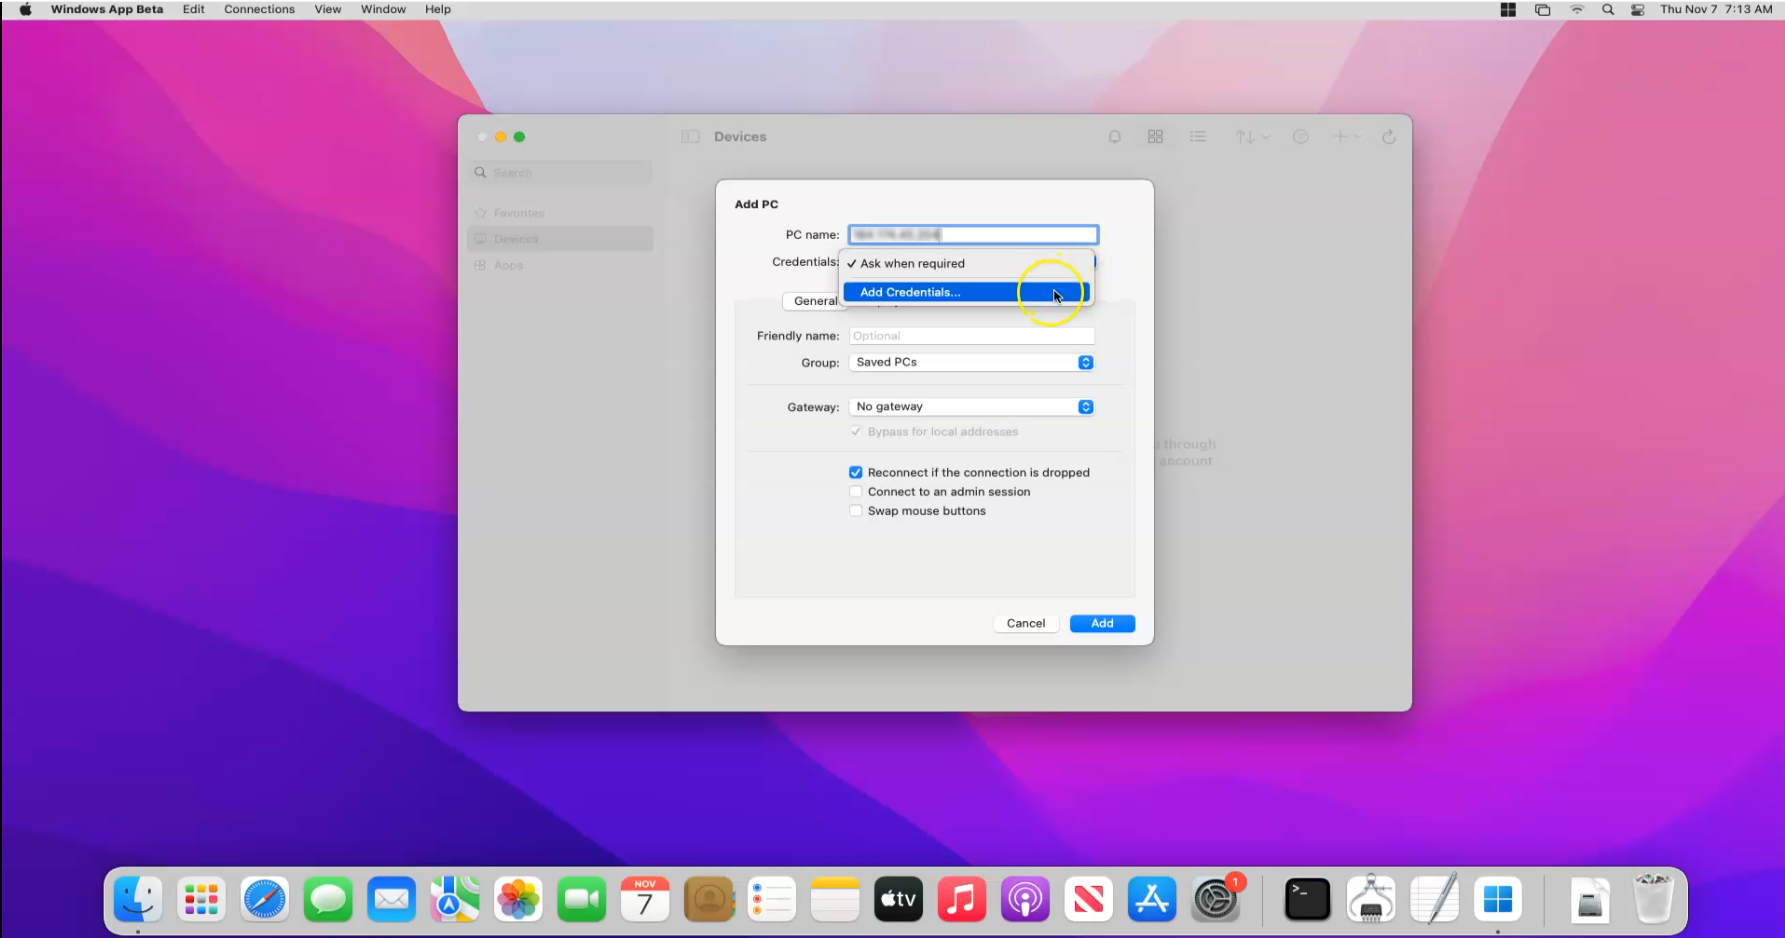
Next, click the dropdown arrow under Credentials, then select Add credentials.
8
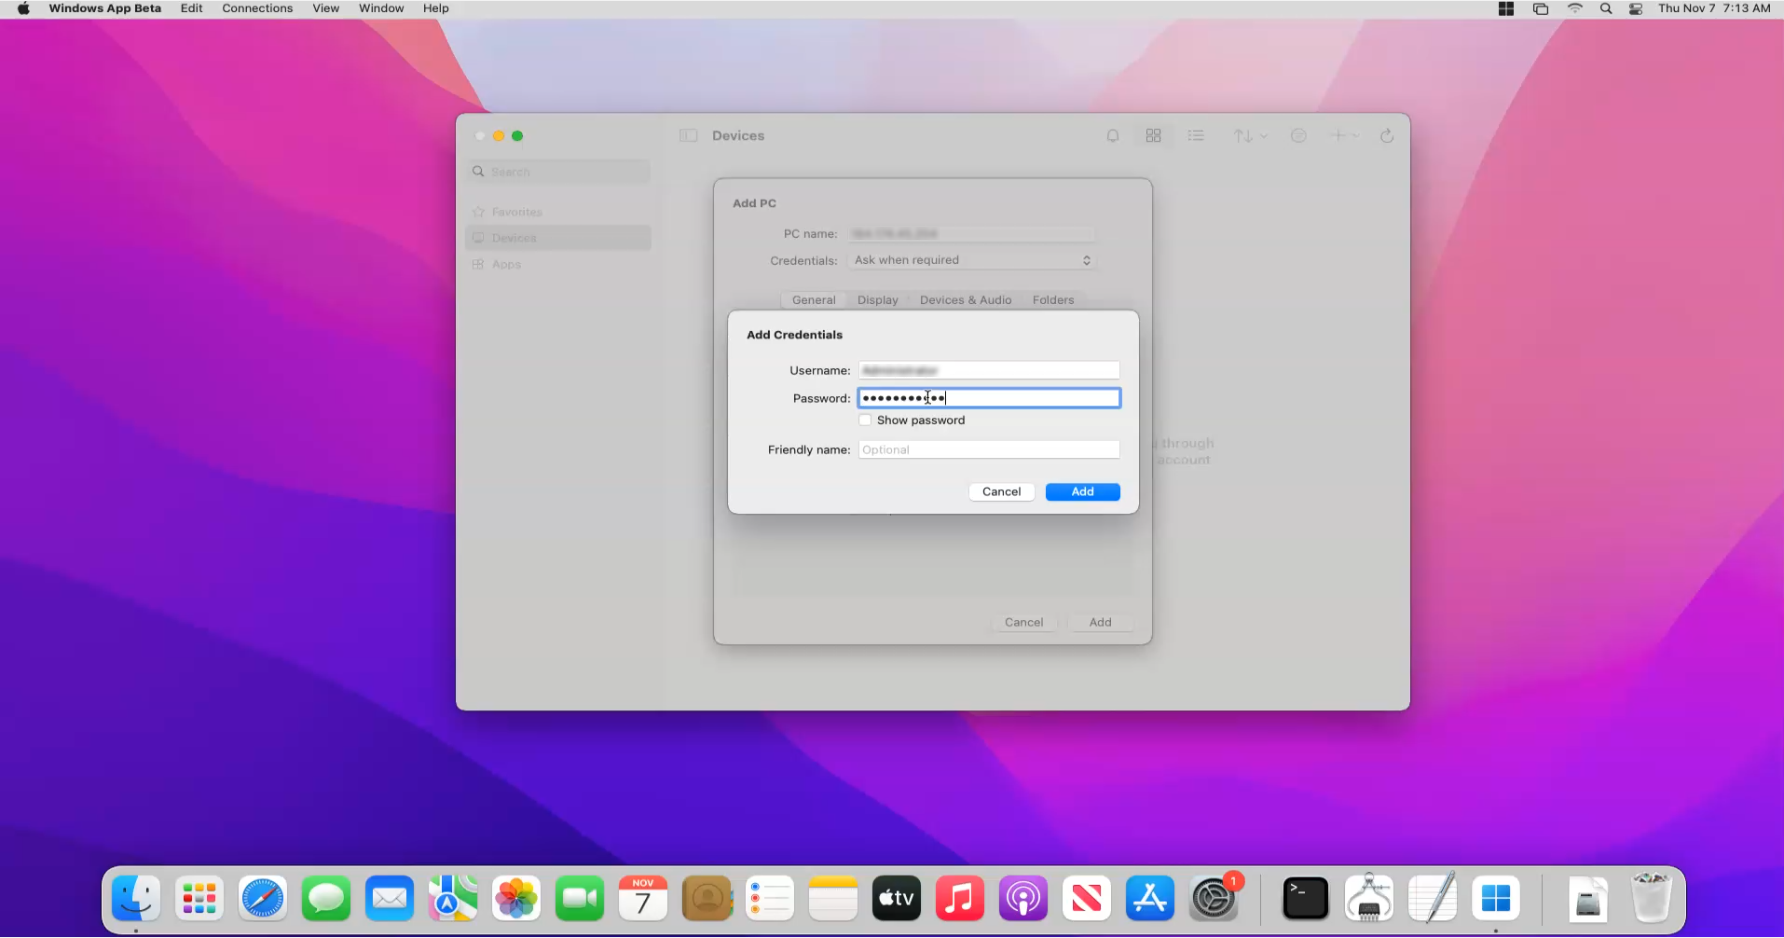
A new window will pop up where you can enter your server’s username and password:
- Copy the username found in your ChartVPS Portal and paste it into the Username field.
- Copy the password found in your ChartVPS Portal and paste it into the Password field.
9
You can also set a friendly name for the credentials. This helps you quickly and easily identify the credentials later — especially if you have multiple server connections. Once you’ve put all the info into its respective fields, go on and click Add.

10
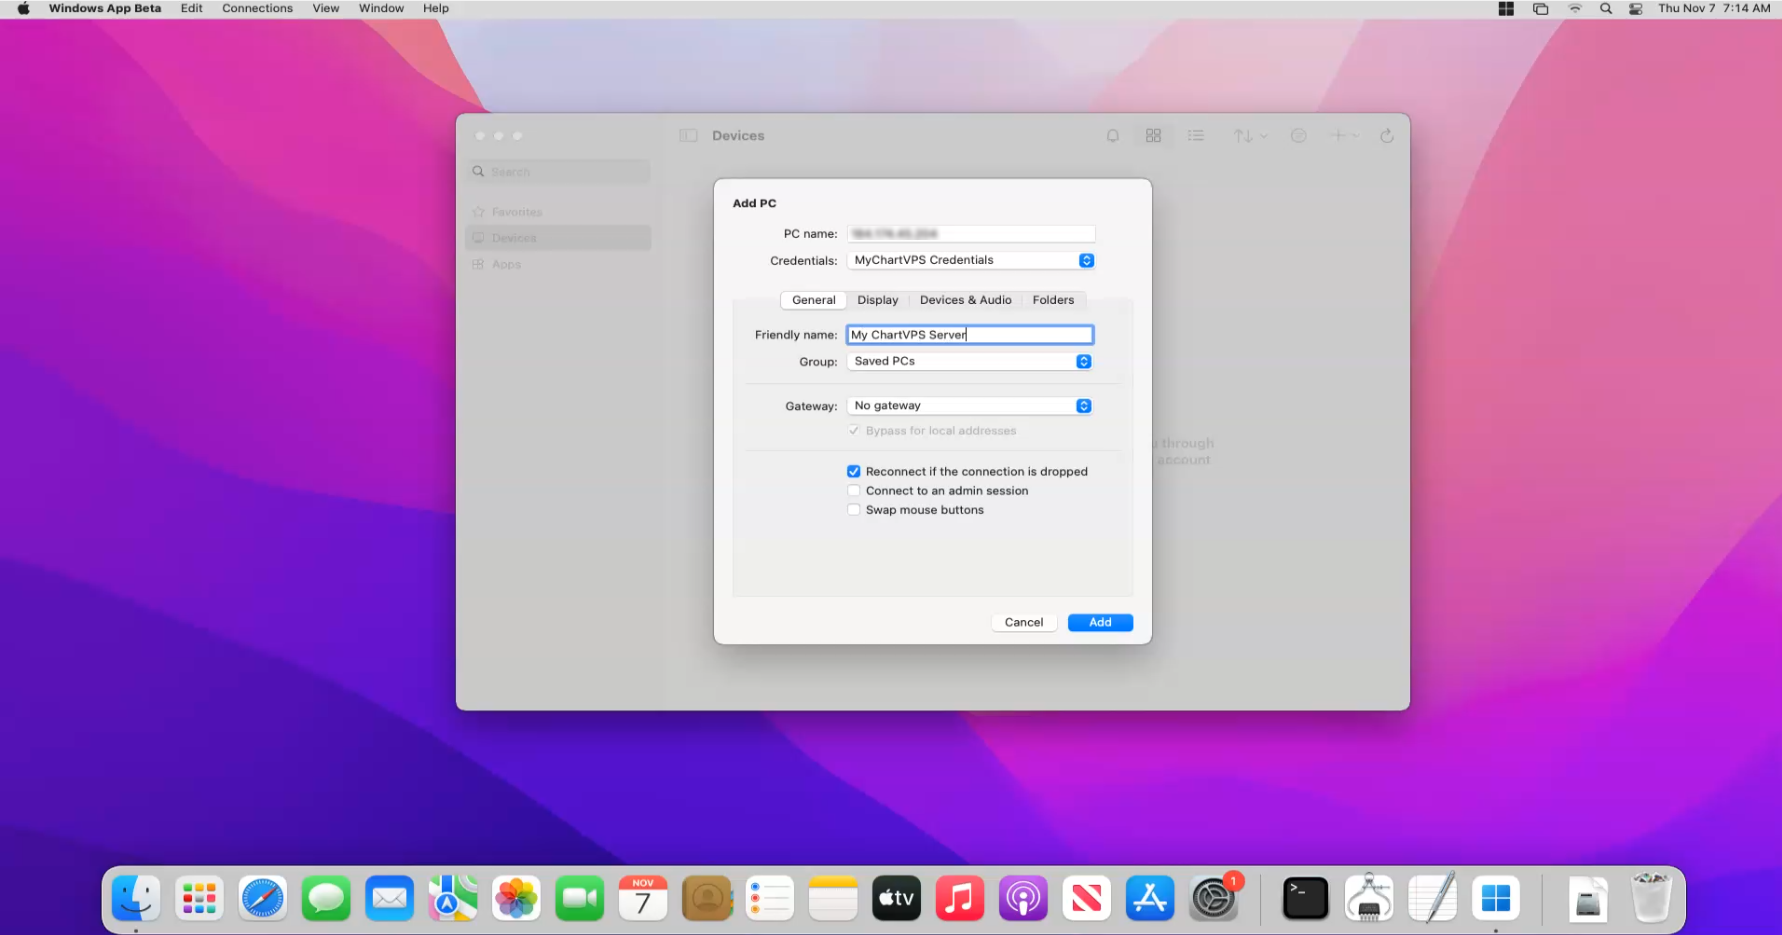
Alright, so you’ve added all of the credentials! The Add Credentials window will close, and you’ll be back on the Add PC window. In the Friendly name field, enter a descriptive name for your server.
- Once you’ve entered the name, click Add.
11
With that done, the Add PC window will close, and your newly added server will appear in the main Windows App window.
12
To connect, simply double-click the server connection you just created!
- You’ll receive a certificate prompt— click Continue to proceed.
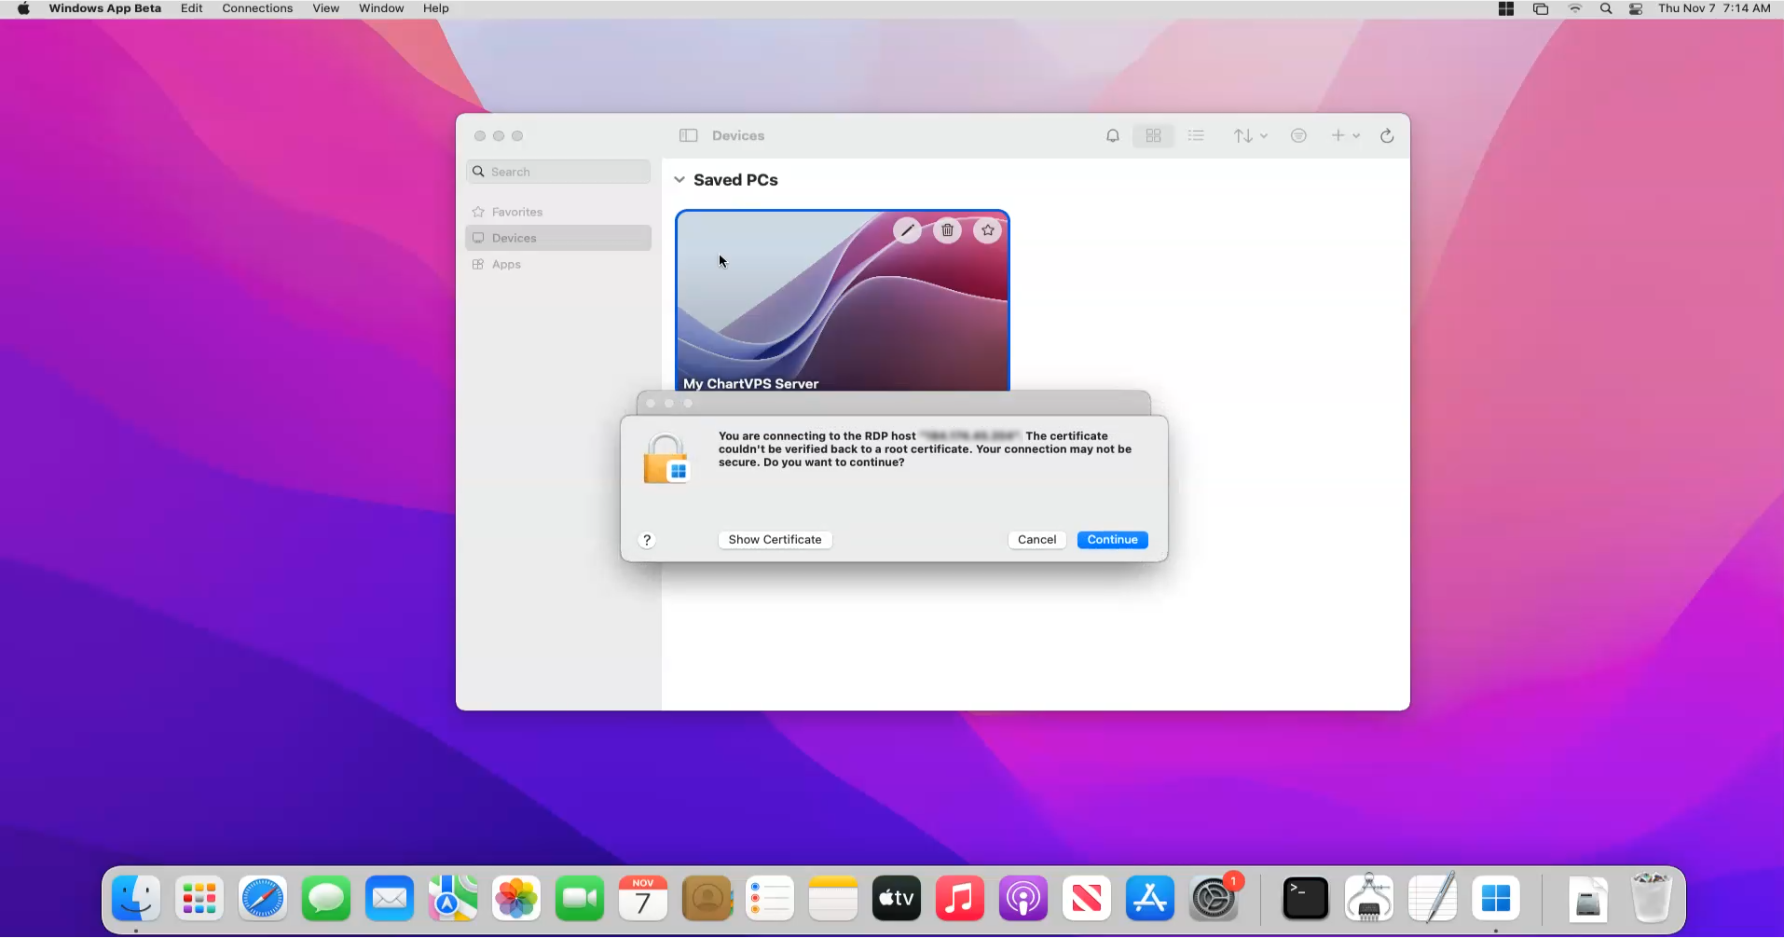
Your connection should now be live, and you can begin using your server.
Connecting to your VPS or Server via Mac OS (Windows App)
